Modding has pushed the creativity of individuals to its limits in the gaming industry, allowing players and creators to not only enjoy a fun experience, but also keep the games relevant beyond their originally expected lifecycle.
The Grand Theft Auto franchise is no stranger to the modding community. Modding has become a staple aspect of every GTA game released in the last decade and more, most notably GTA 5, GTA 4, and the classic GTA San Andreas.
If you want to spice up your GTA 5's single-player experience, look no further, as this guide will walk you through everything you need to know to mod GTA 5.
Game Backup
As with anything you alter, it is always a good idea to create a backup of your original files in case something goes wrong. First, it is best to create a backup of your original GTA 5 game directory.
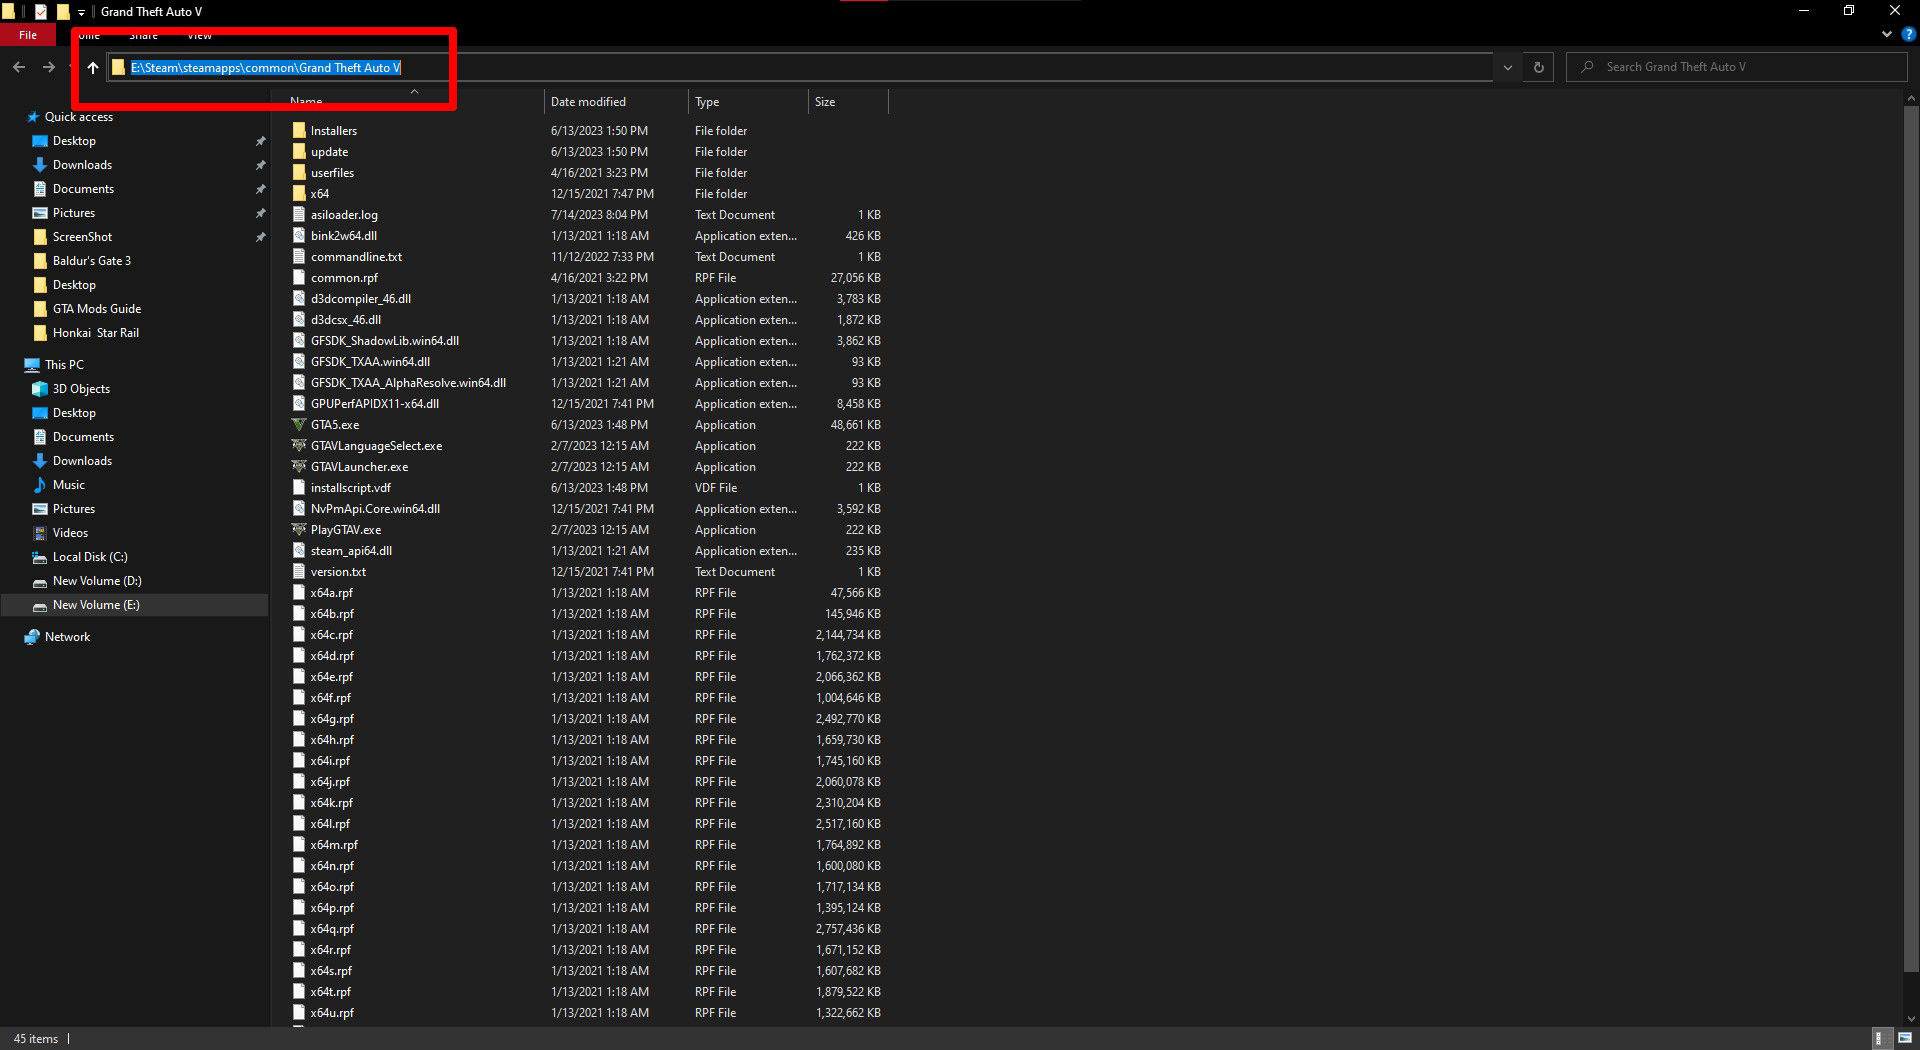
If you have the game on Steam, you can reach the game directory by right-clicking on the game name, going to 'Manage,' and selecting 'Browse local files.'

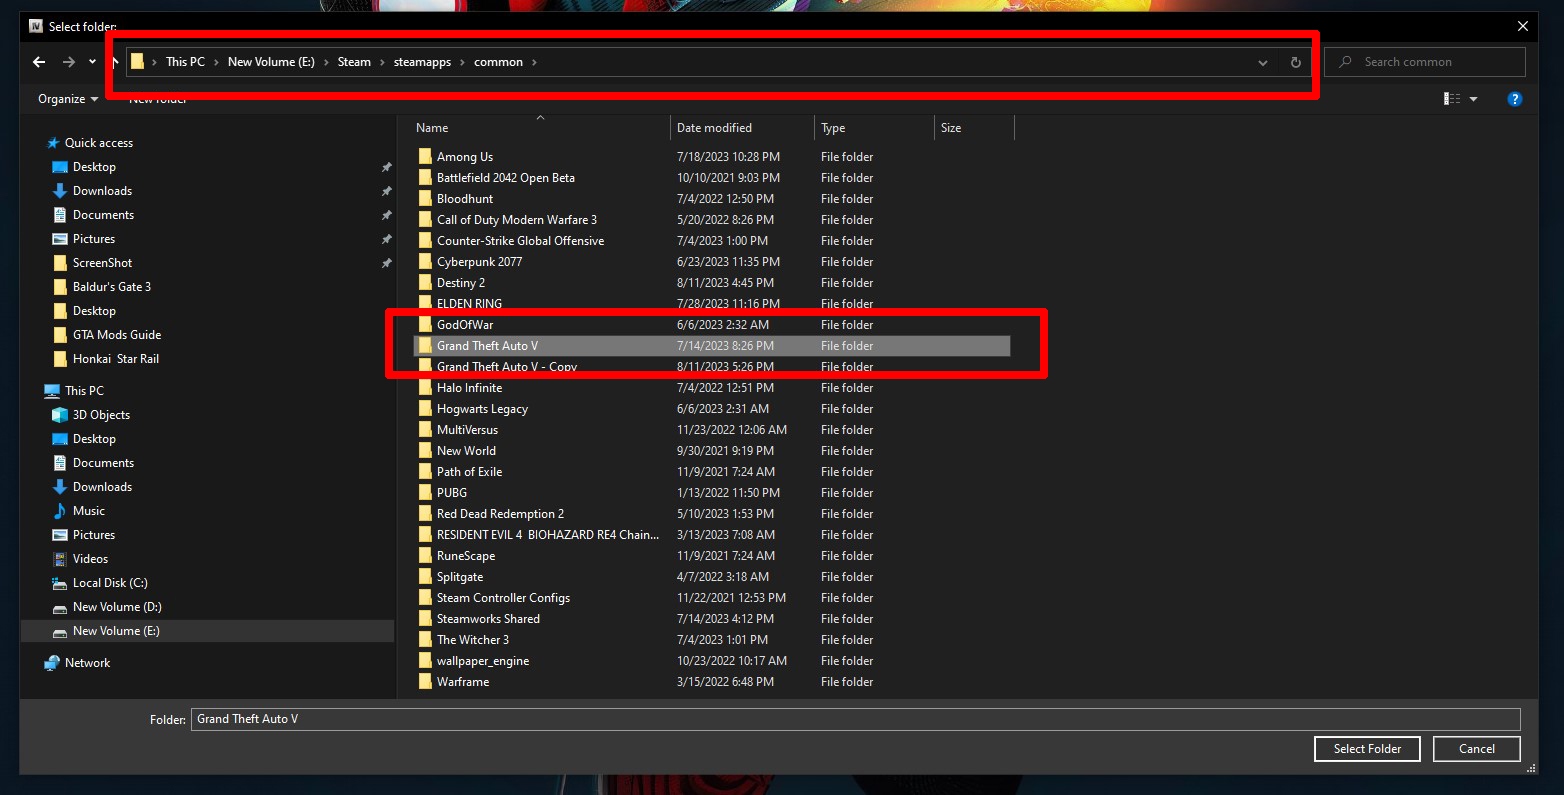
You will land inside the GTA 5 game directory. Go back up one folder, create a copy of the Grand Theft Auto V folder, and paste it somewhere safe. I usually keep it in the same folder to save time in the future, should I need to get the original files back.
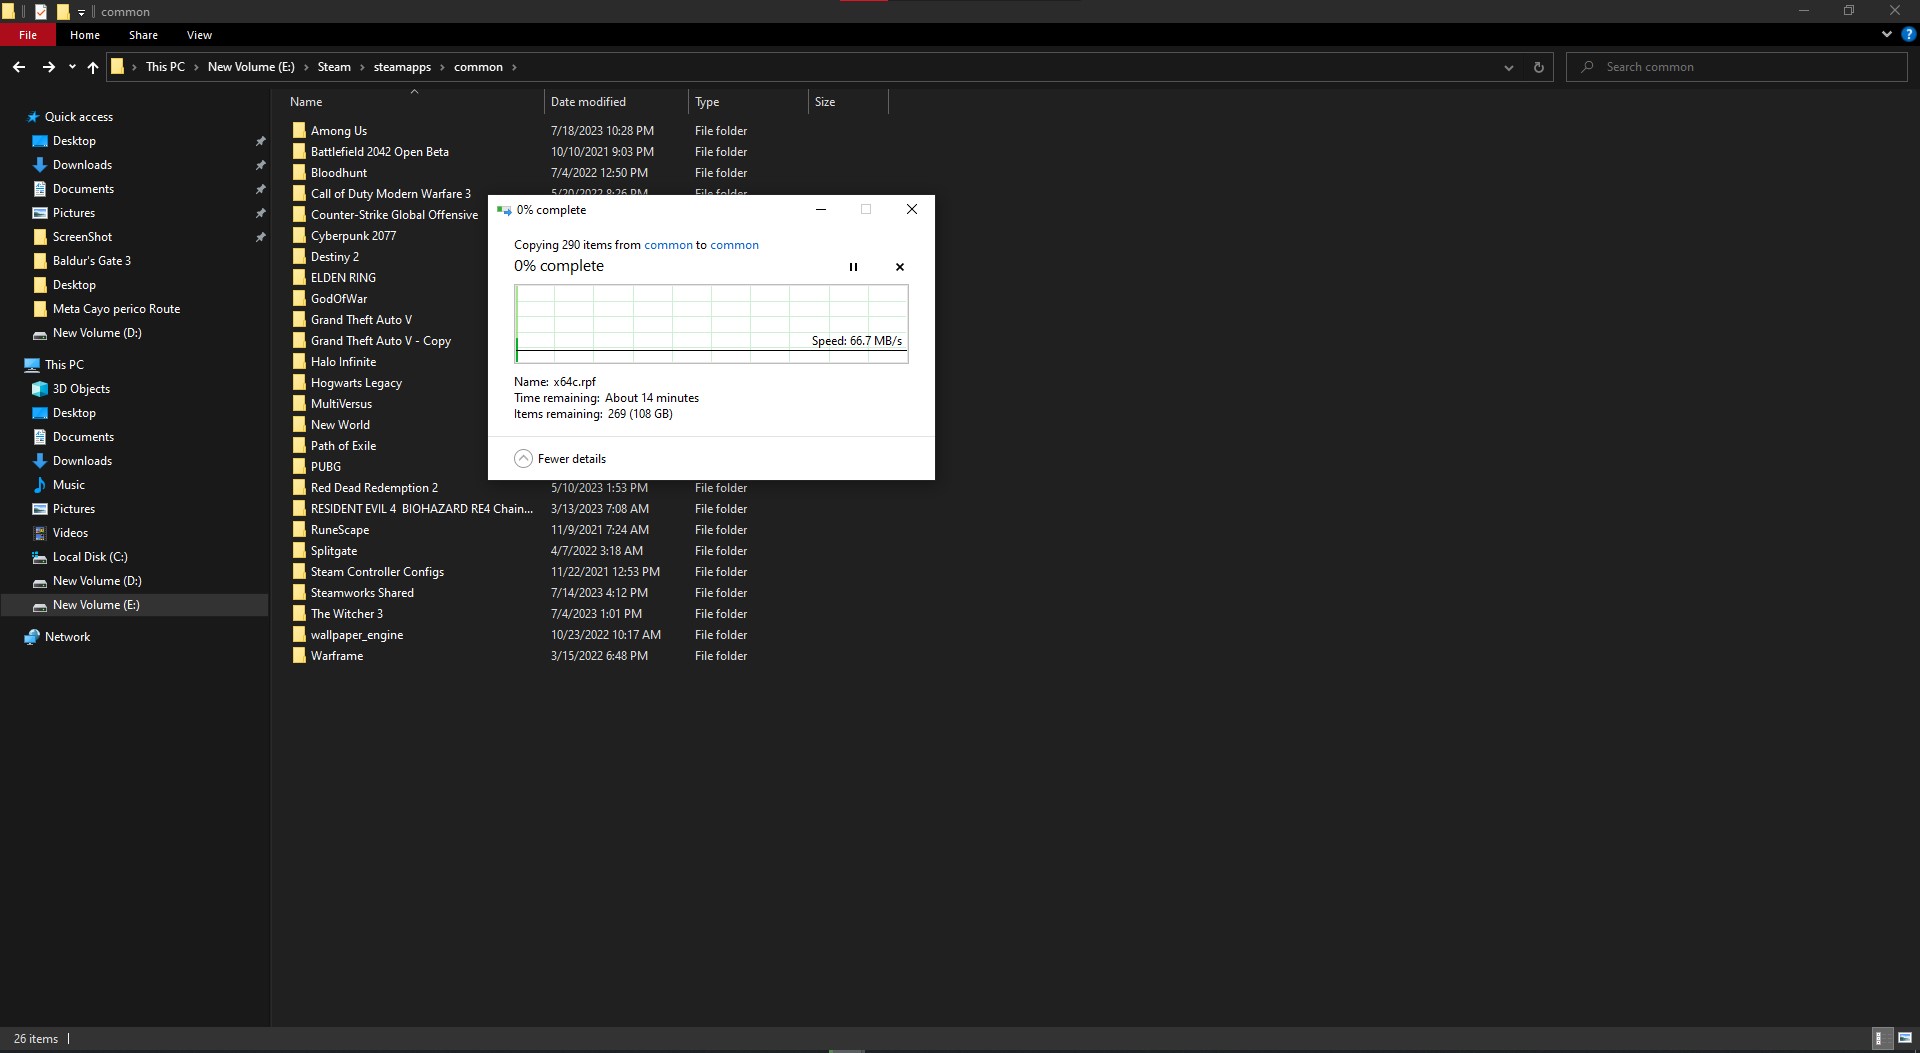
You will have two files once copied. The one named 'Grand Theft Auto V' is the game executable folder and the one we will mod. And 'Grand Theft Auto V - copy' is the backup. You can rename the backup folder, whatever you like. But do not name it 'Grand Theft Auto V,' or the game will recognize the executable from that folder.
Open IV Setup
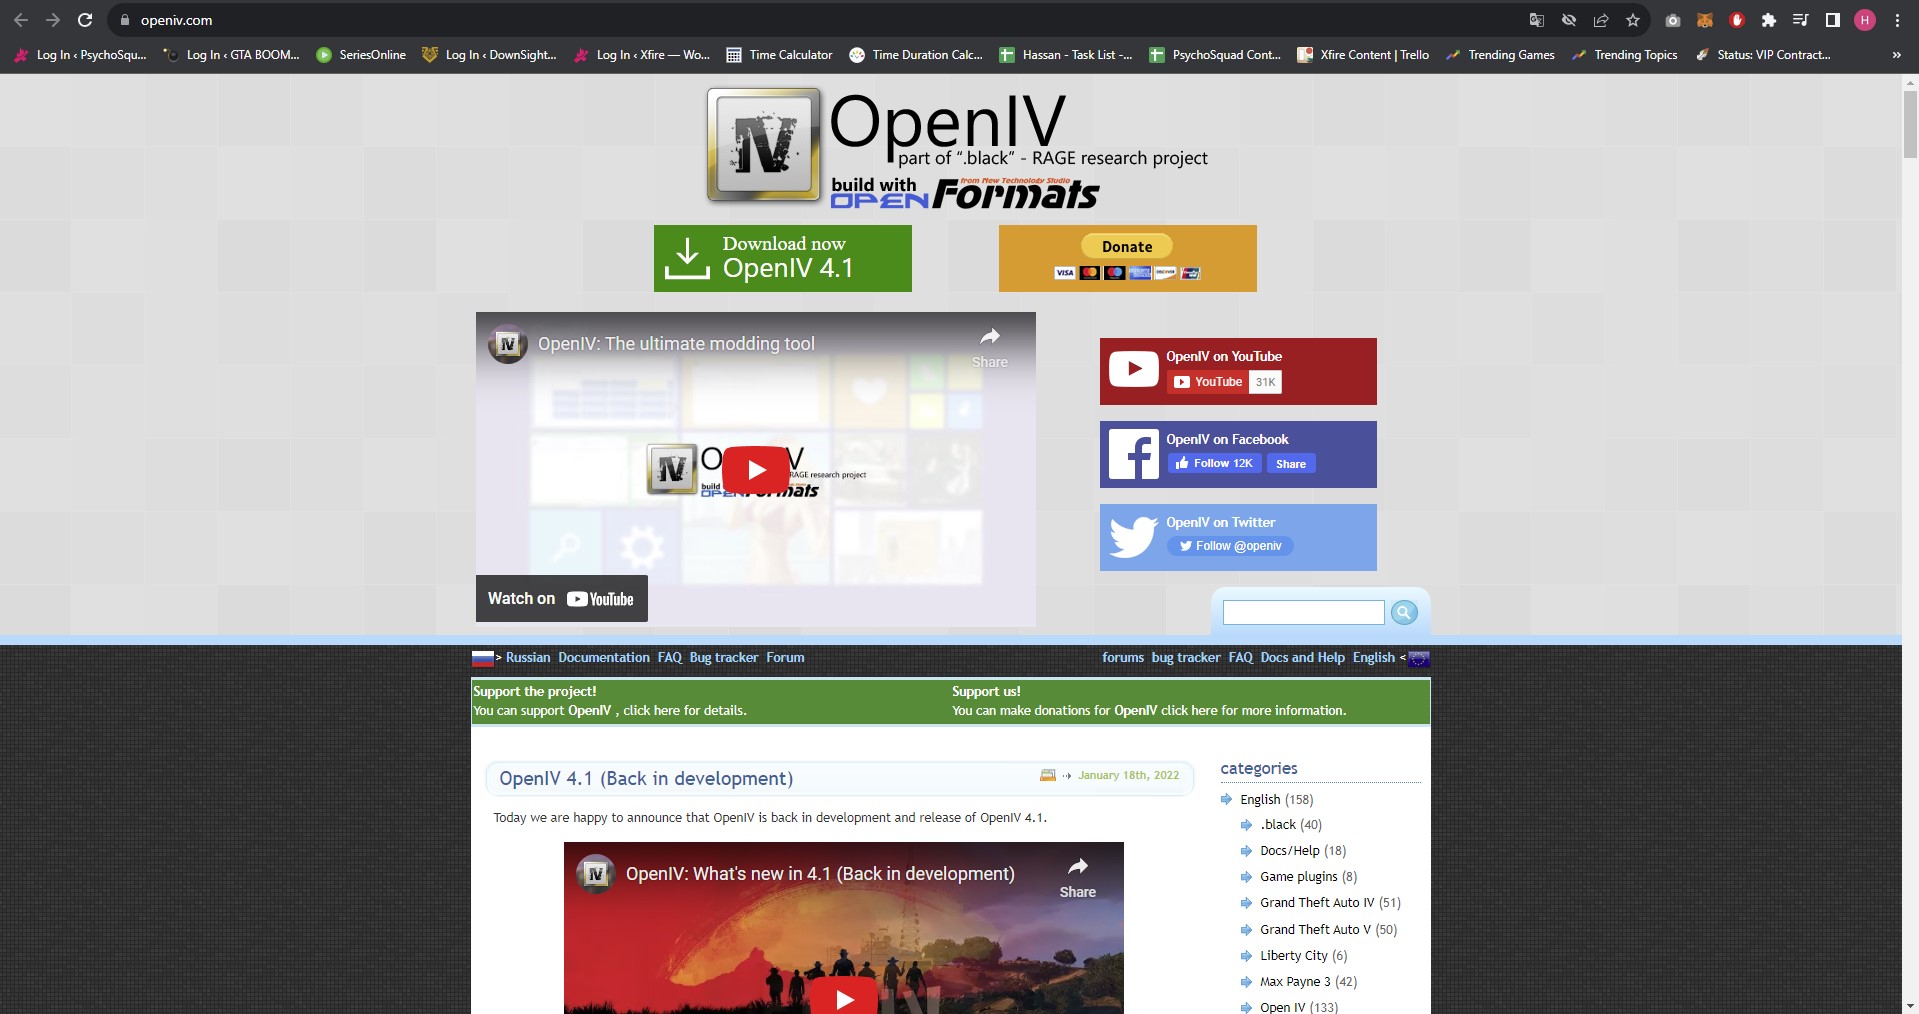
Next, we need to set up Open IV. Open IV is a multi-purpose mod manager for the PC version of GTA 5. You can download Open IV from the official website.
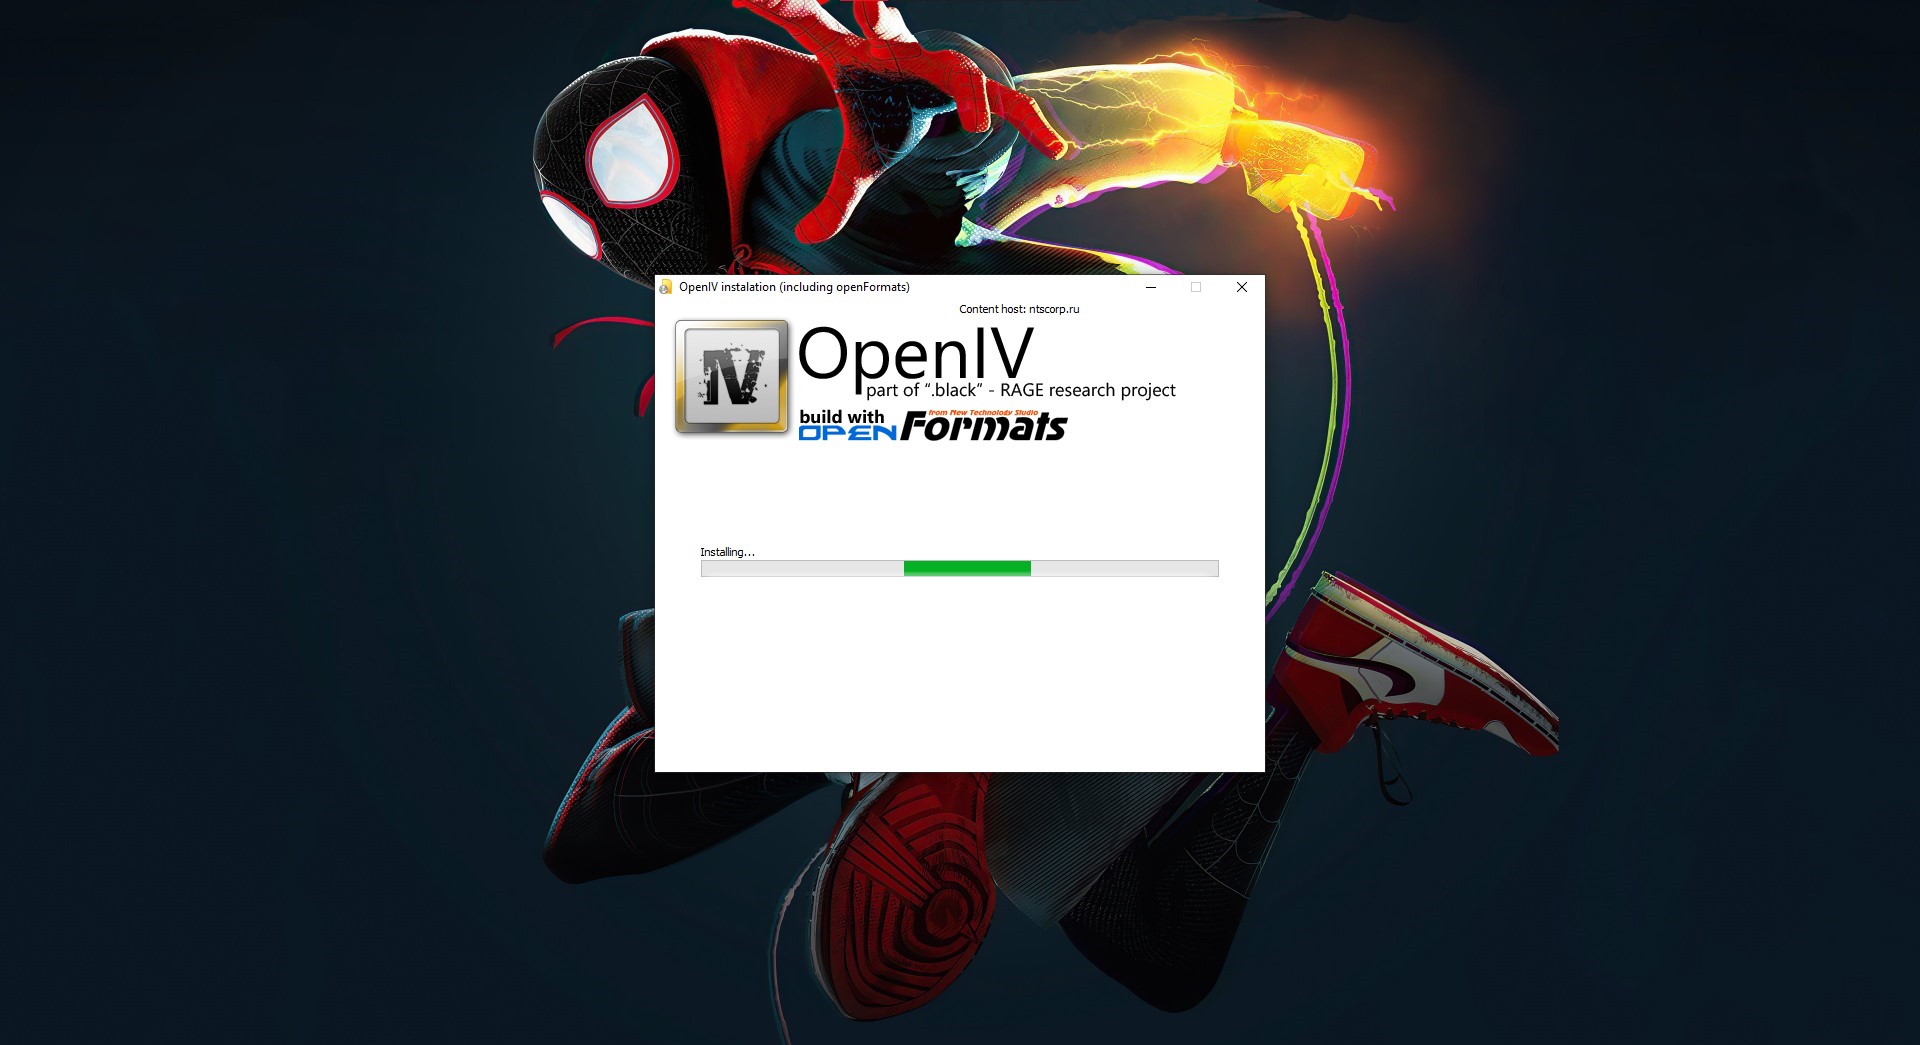
Click on the green button to download the file and install it.
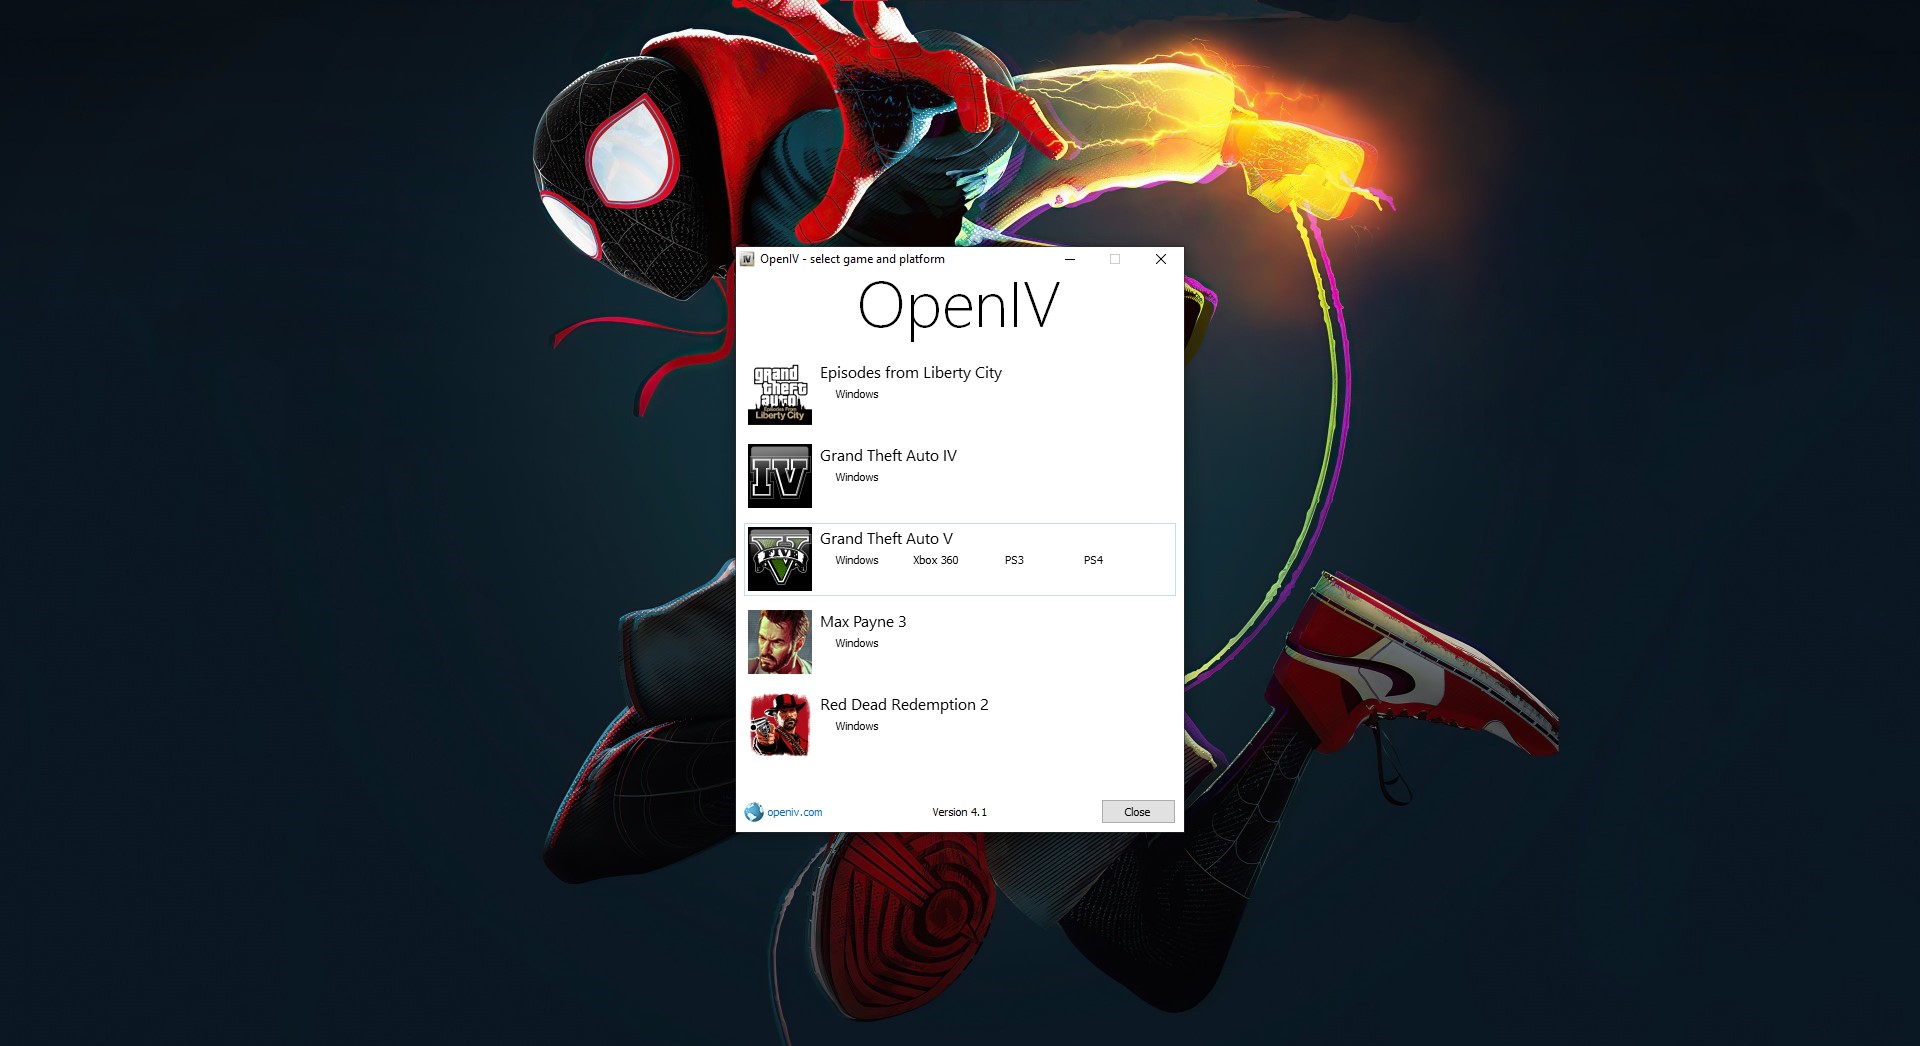
Run the program, and you will be asked to select the game and platform you want to mod.
Select 'Grand Theft Auto V' and the 'Windows' button under the name.
It will ask you to navigate to the GTA 5 game folder. When you click 'Browse,' it sometimes automatically detects the folder. However, if it doesn't, you can return to your game directory and copy the folder path from the top.
Go back to Open IV, paste it into the path bar, and click 'Select Folder.'
It will show green text indicating the correct folder has been identified.
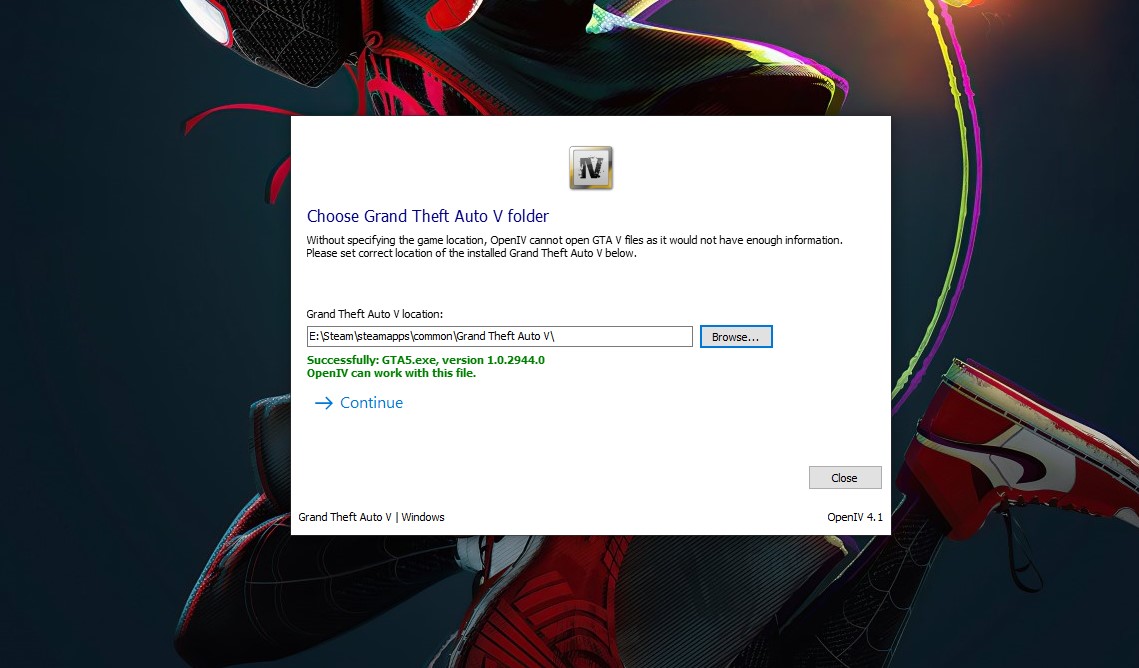
Click 'Continue,' and it will load and take you to the main Open IV interface.
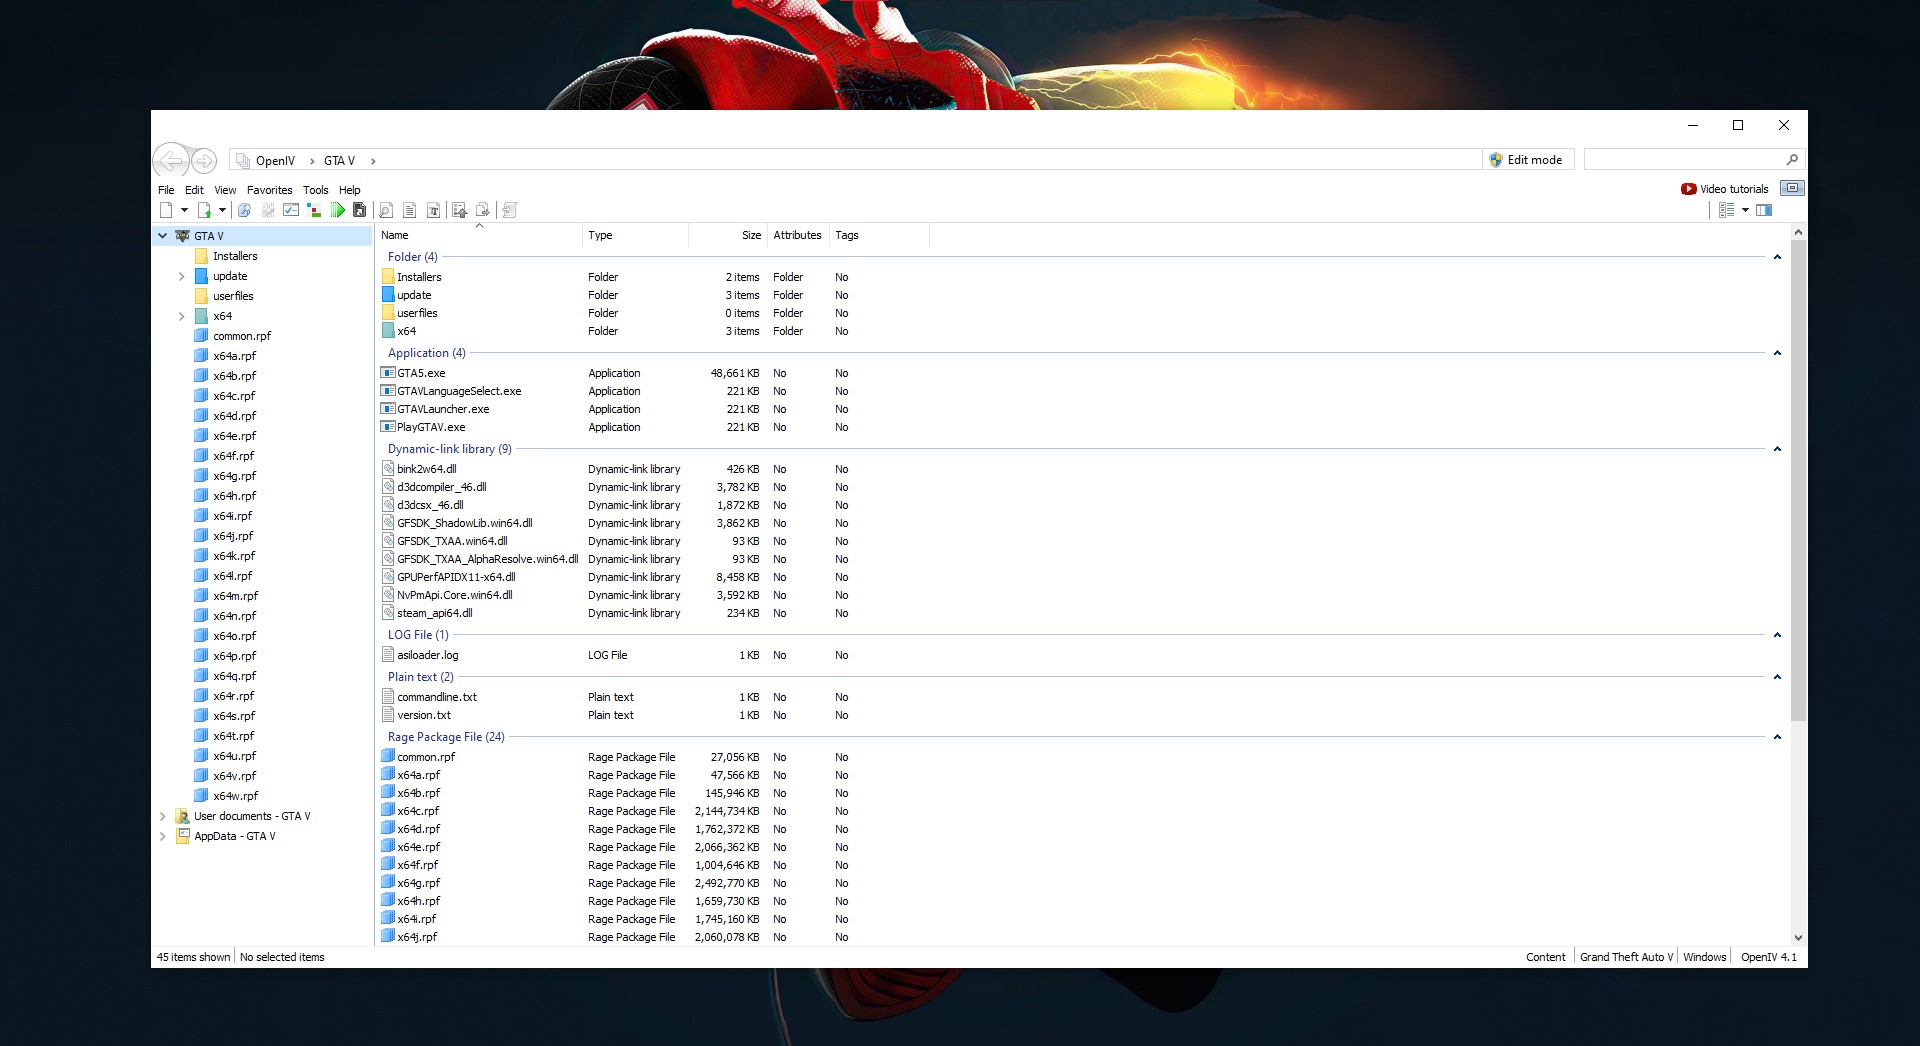
At the top, click on Tools > ASI Manager.
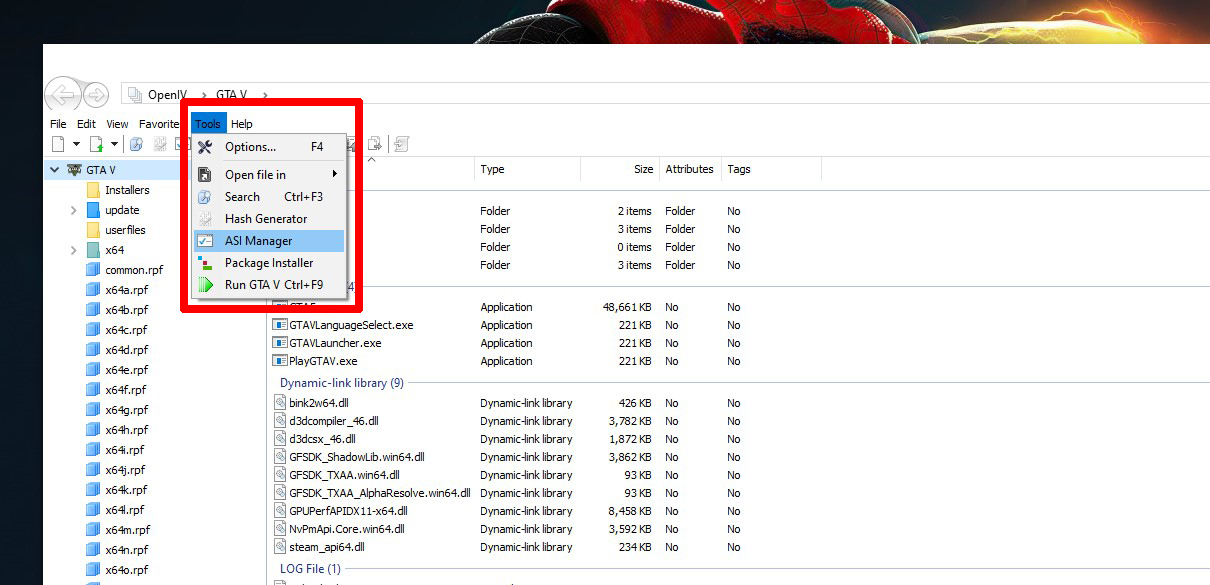
You need to install two main components from the ASI Manager. The first is the ASI Loader, and the second is the OpenIV.ASI. These two files are the fundamental files needed for the mods to work.
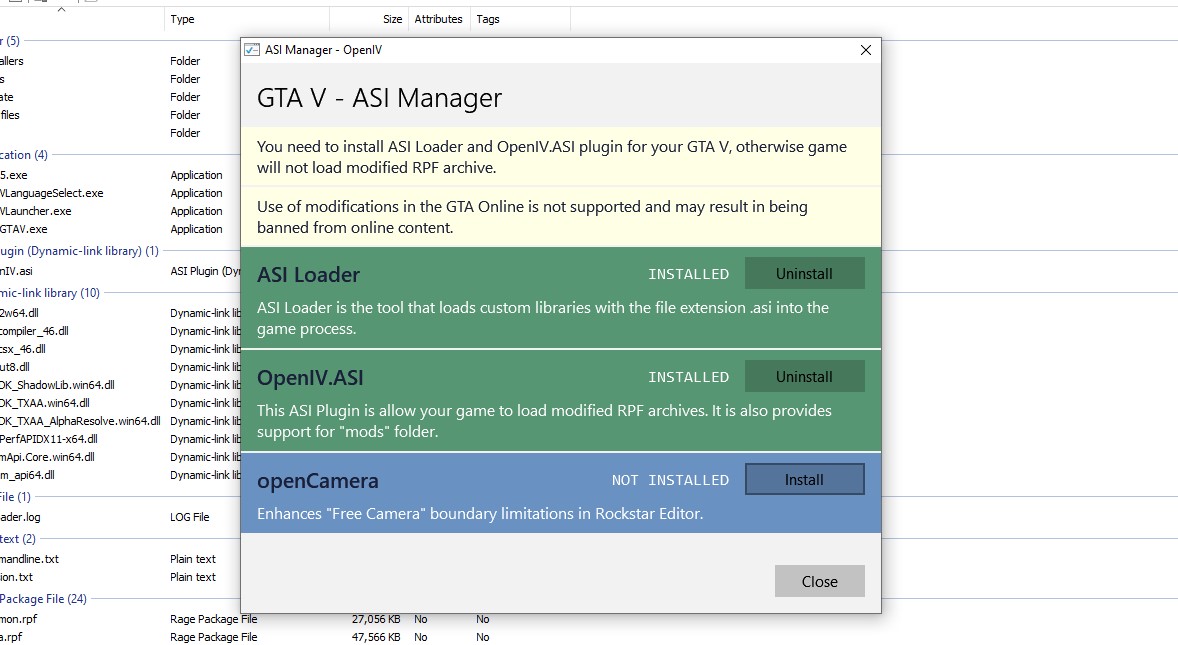
You can also get openCamera if you're an avid Rockstar Editor user. This removes the default camera boundary in Rockstar Editor, which is quite handy and leaves more room for creativity.
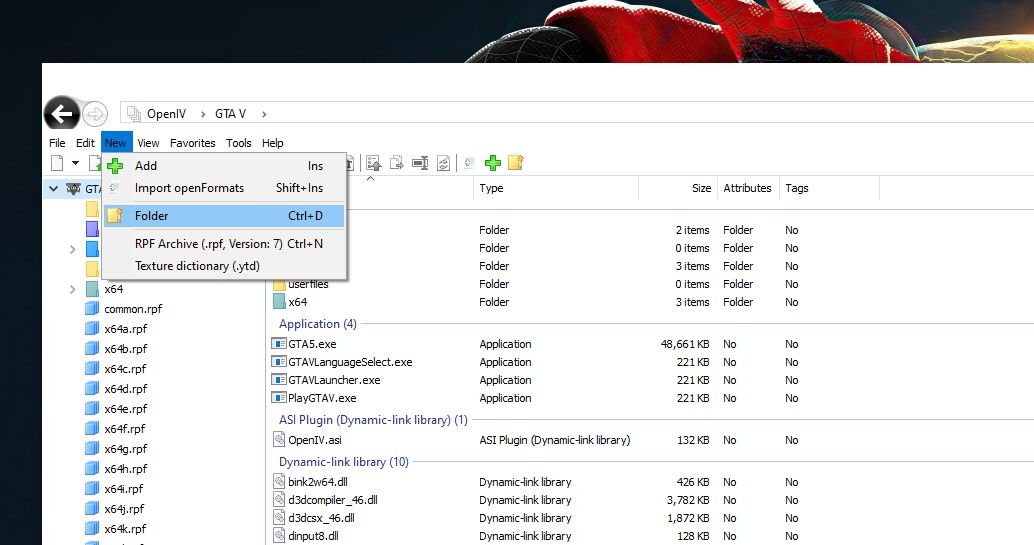
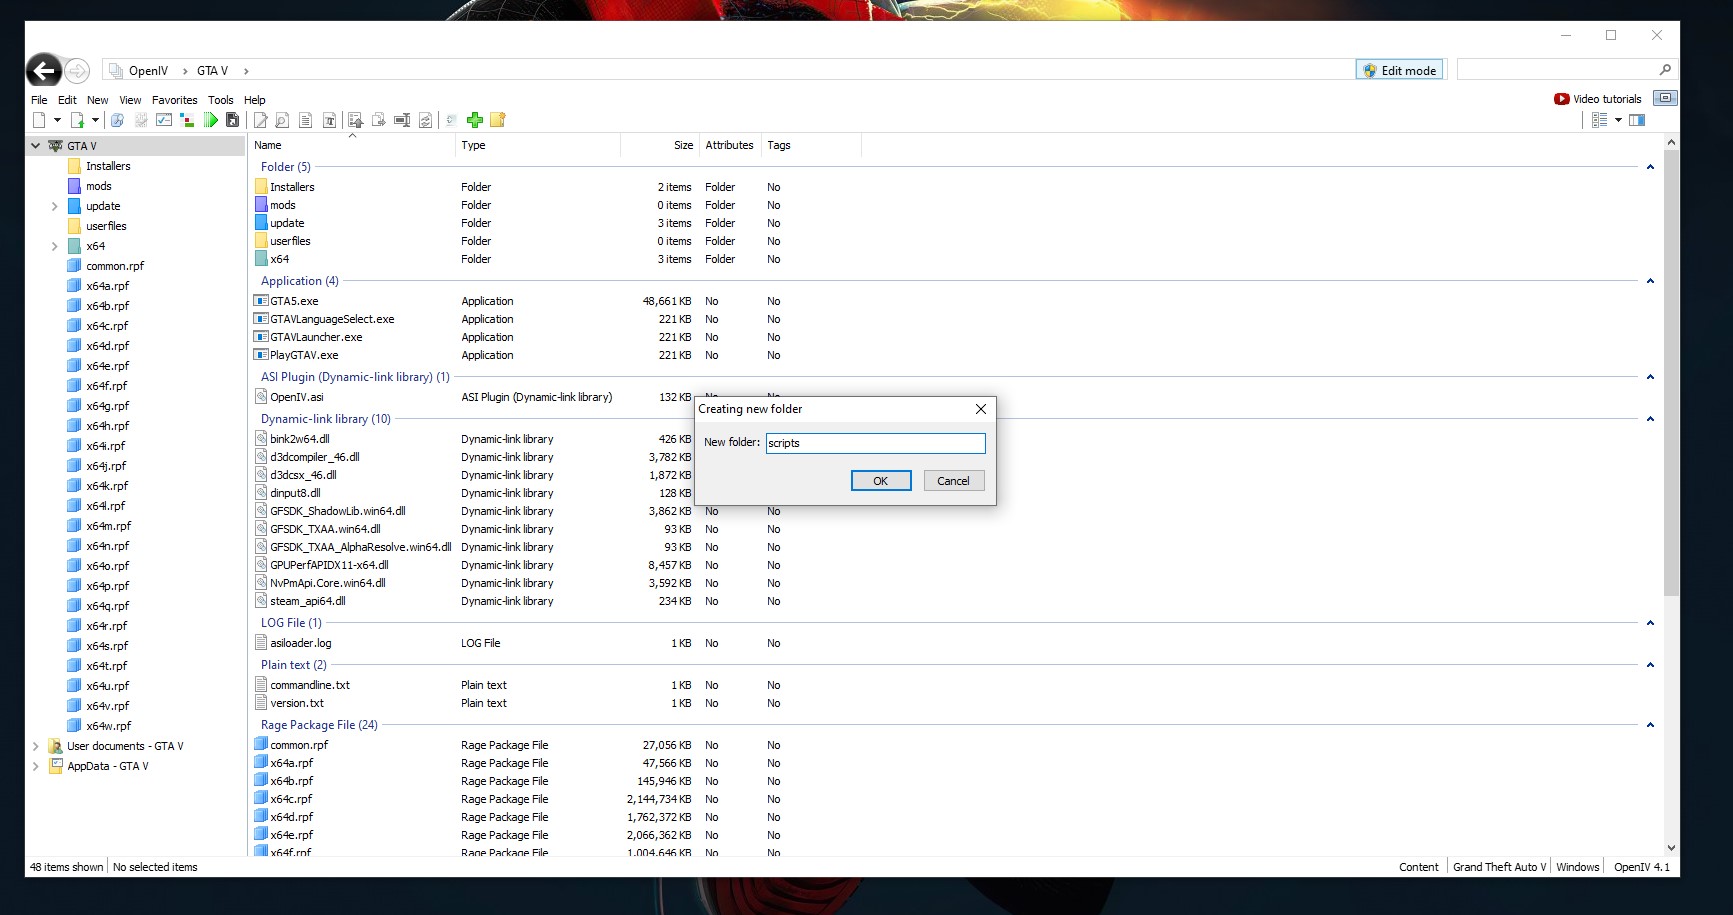
Click 'Edit Mode' at the top-right corner of the interface, which will now put you in edit mode. While in edit mode, you can edit, create or delete the game files.
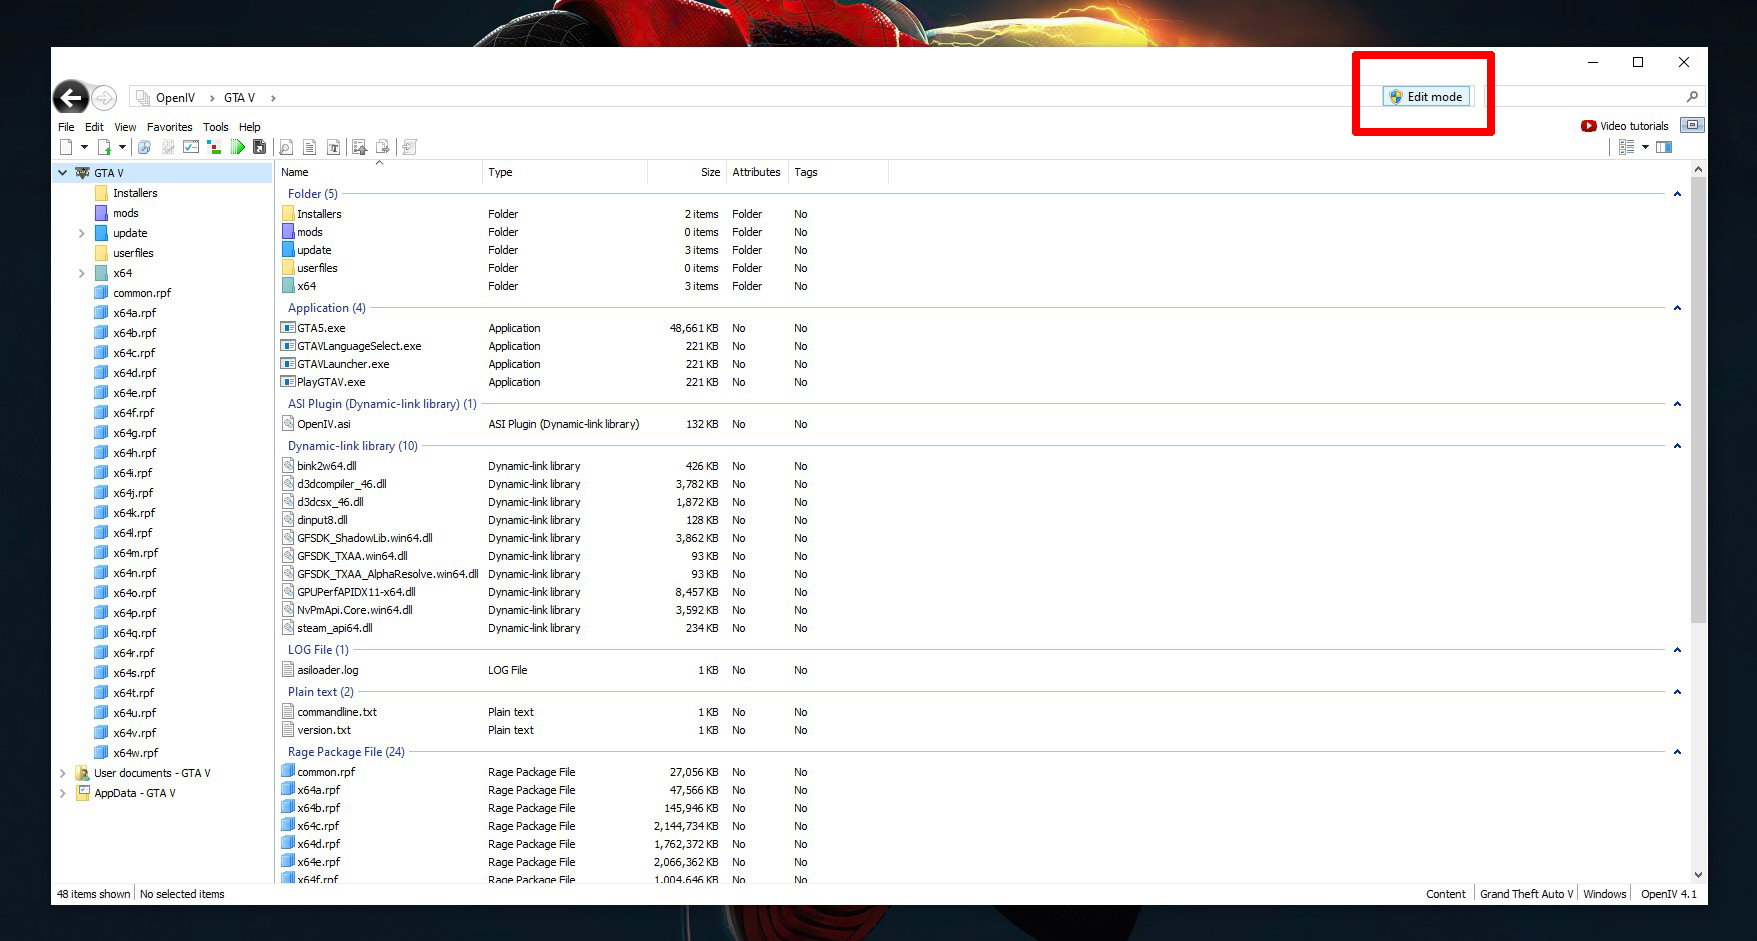
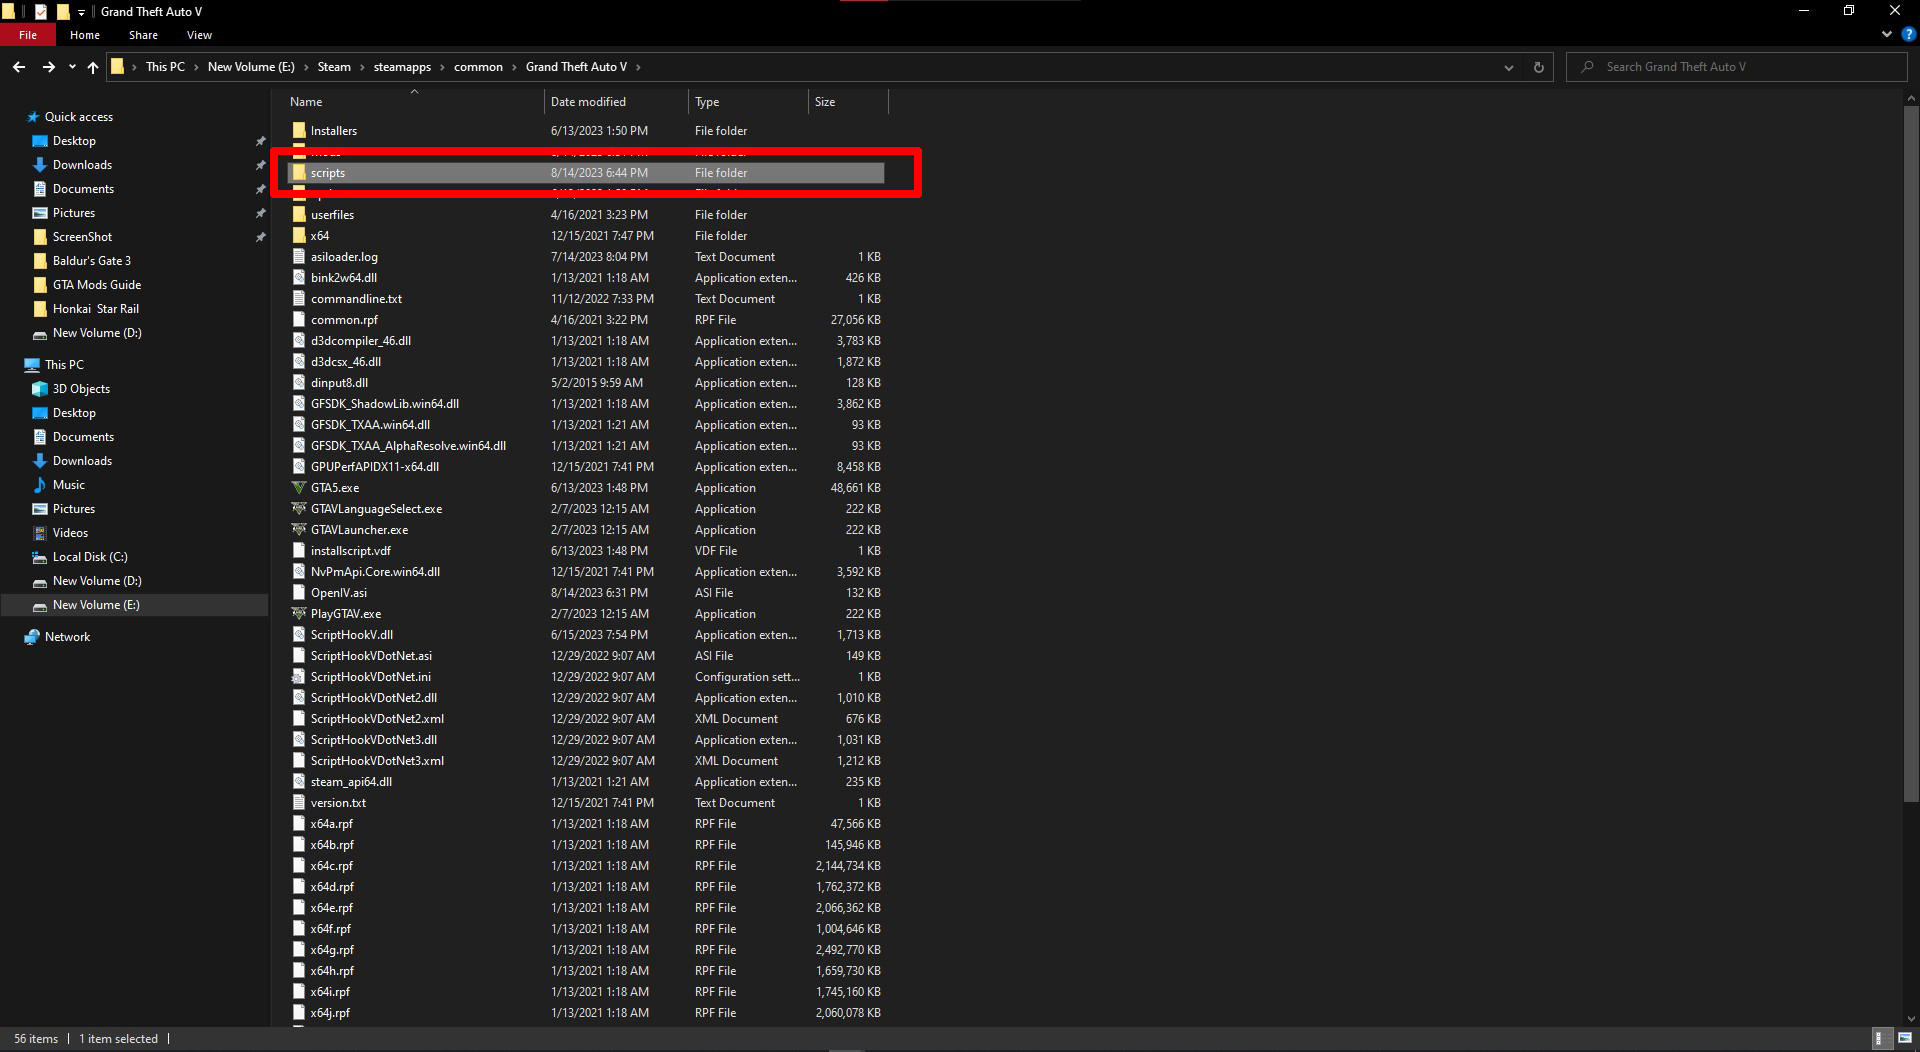
Click 'New' at the top-left corner and create a new folder named 'scripts.' It is case-sensitive, so ensure it is written exactly as I've written it.
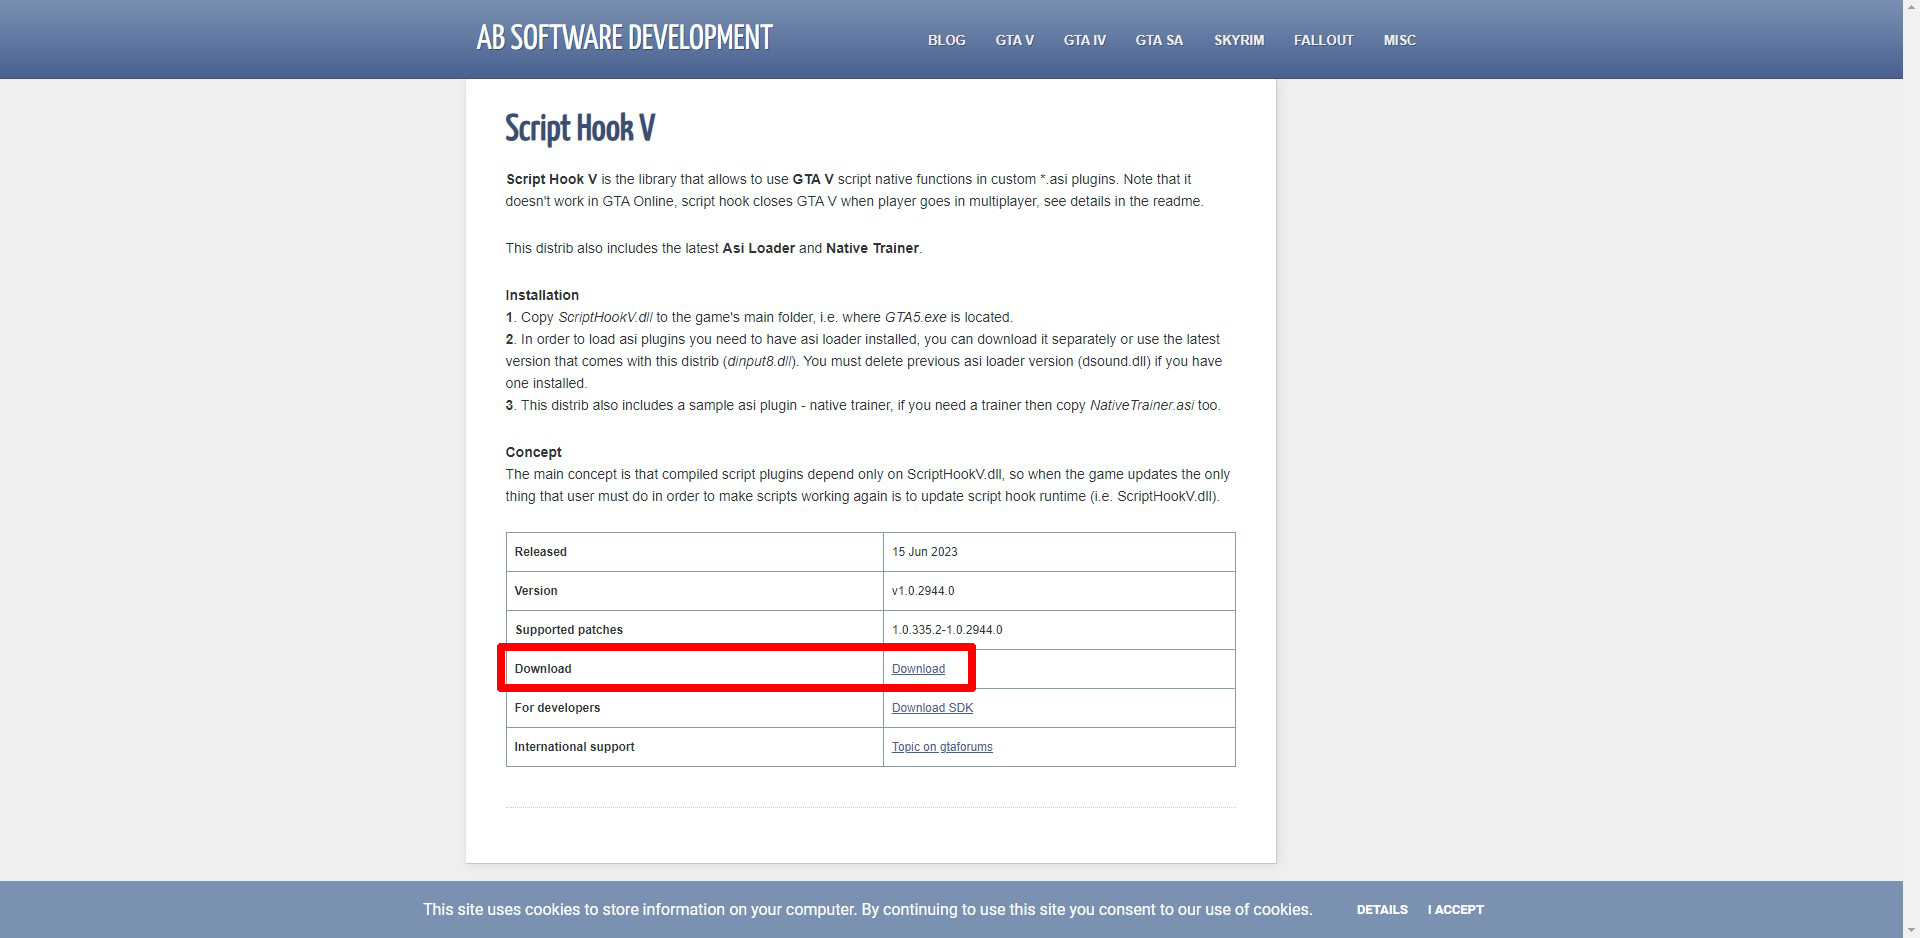
Next, you need to download Script Hook V. Script Hook V allows you to run different scripts in GTA 5. You can download the latest version from the official Script Hook V website.
Once downloaded, extract the zip file, and you will get a bin folder. Inside the bin folder, you will find three files. You only need two of these. You can ignore the NativeTrainer.asi file, as we will install a better trainer.
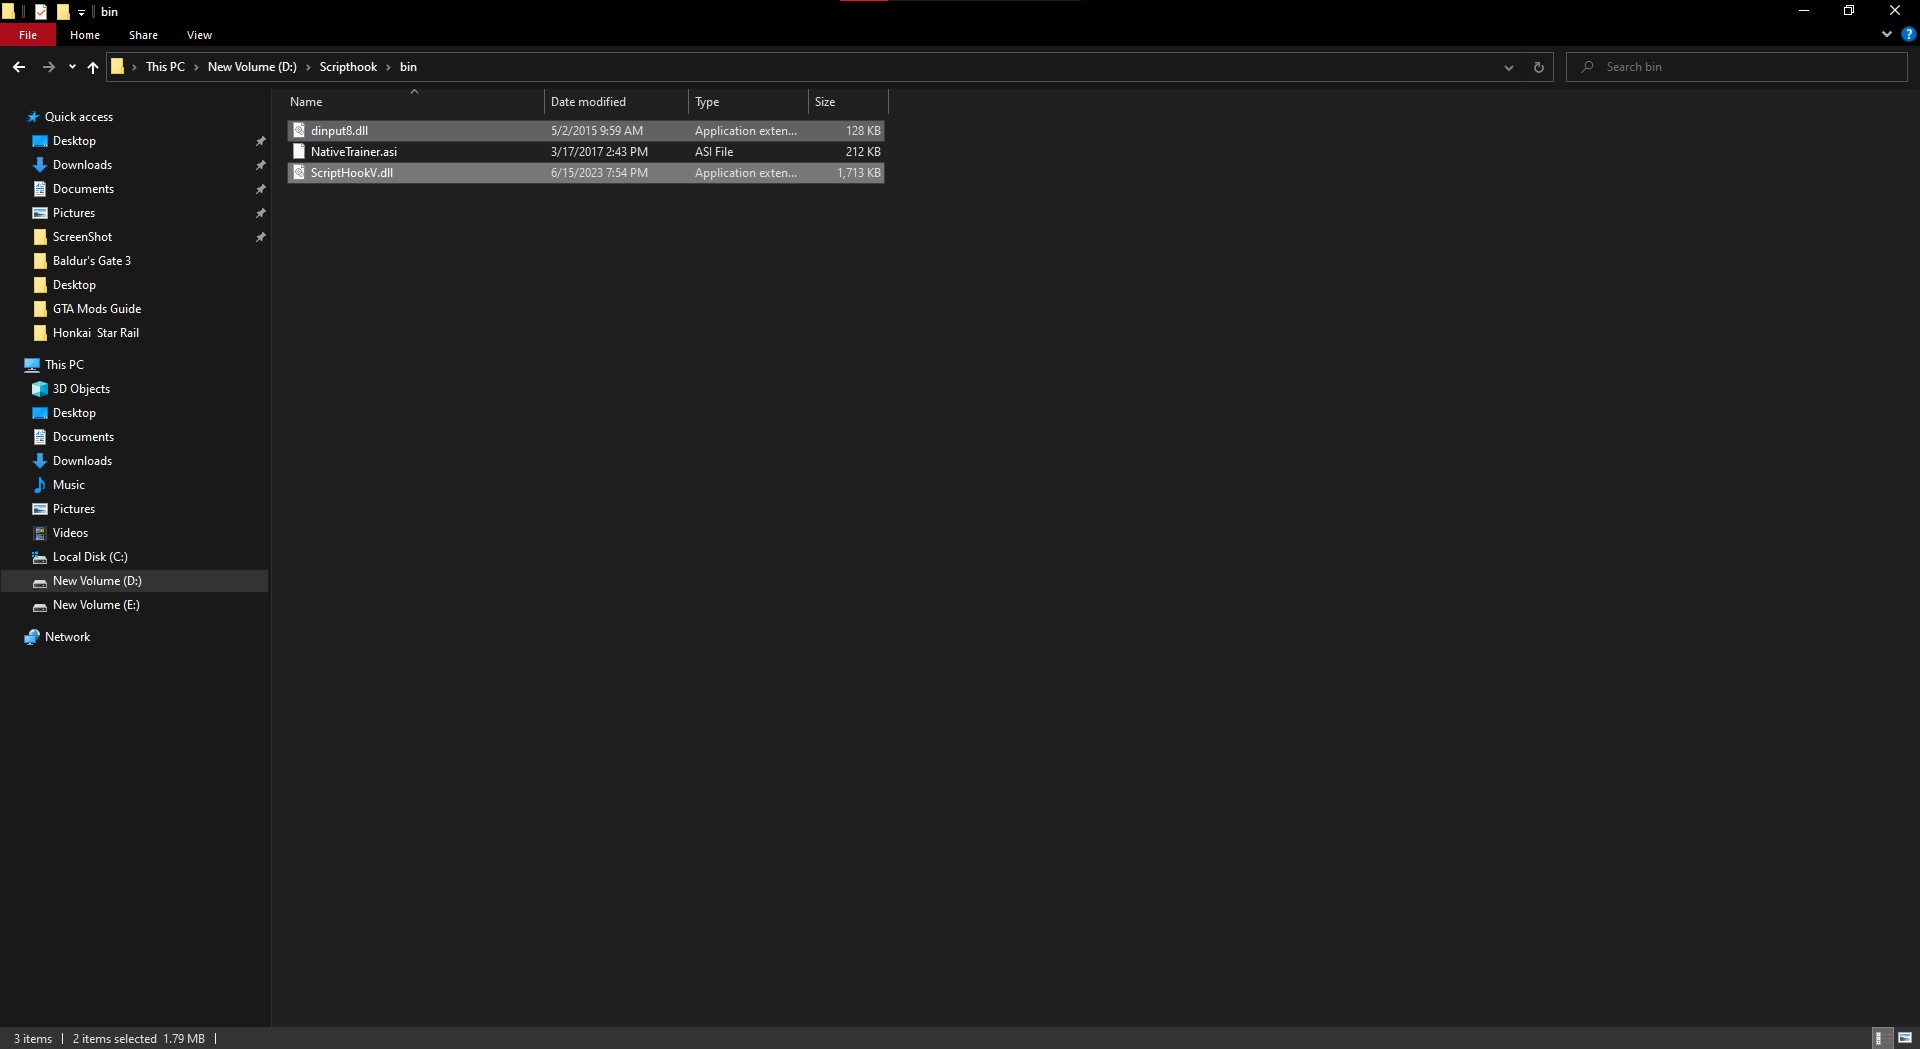
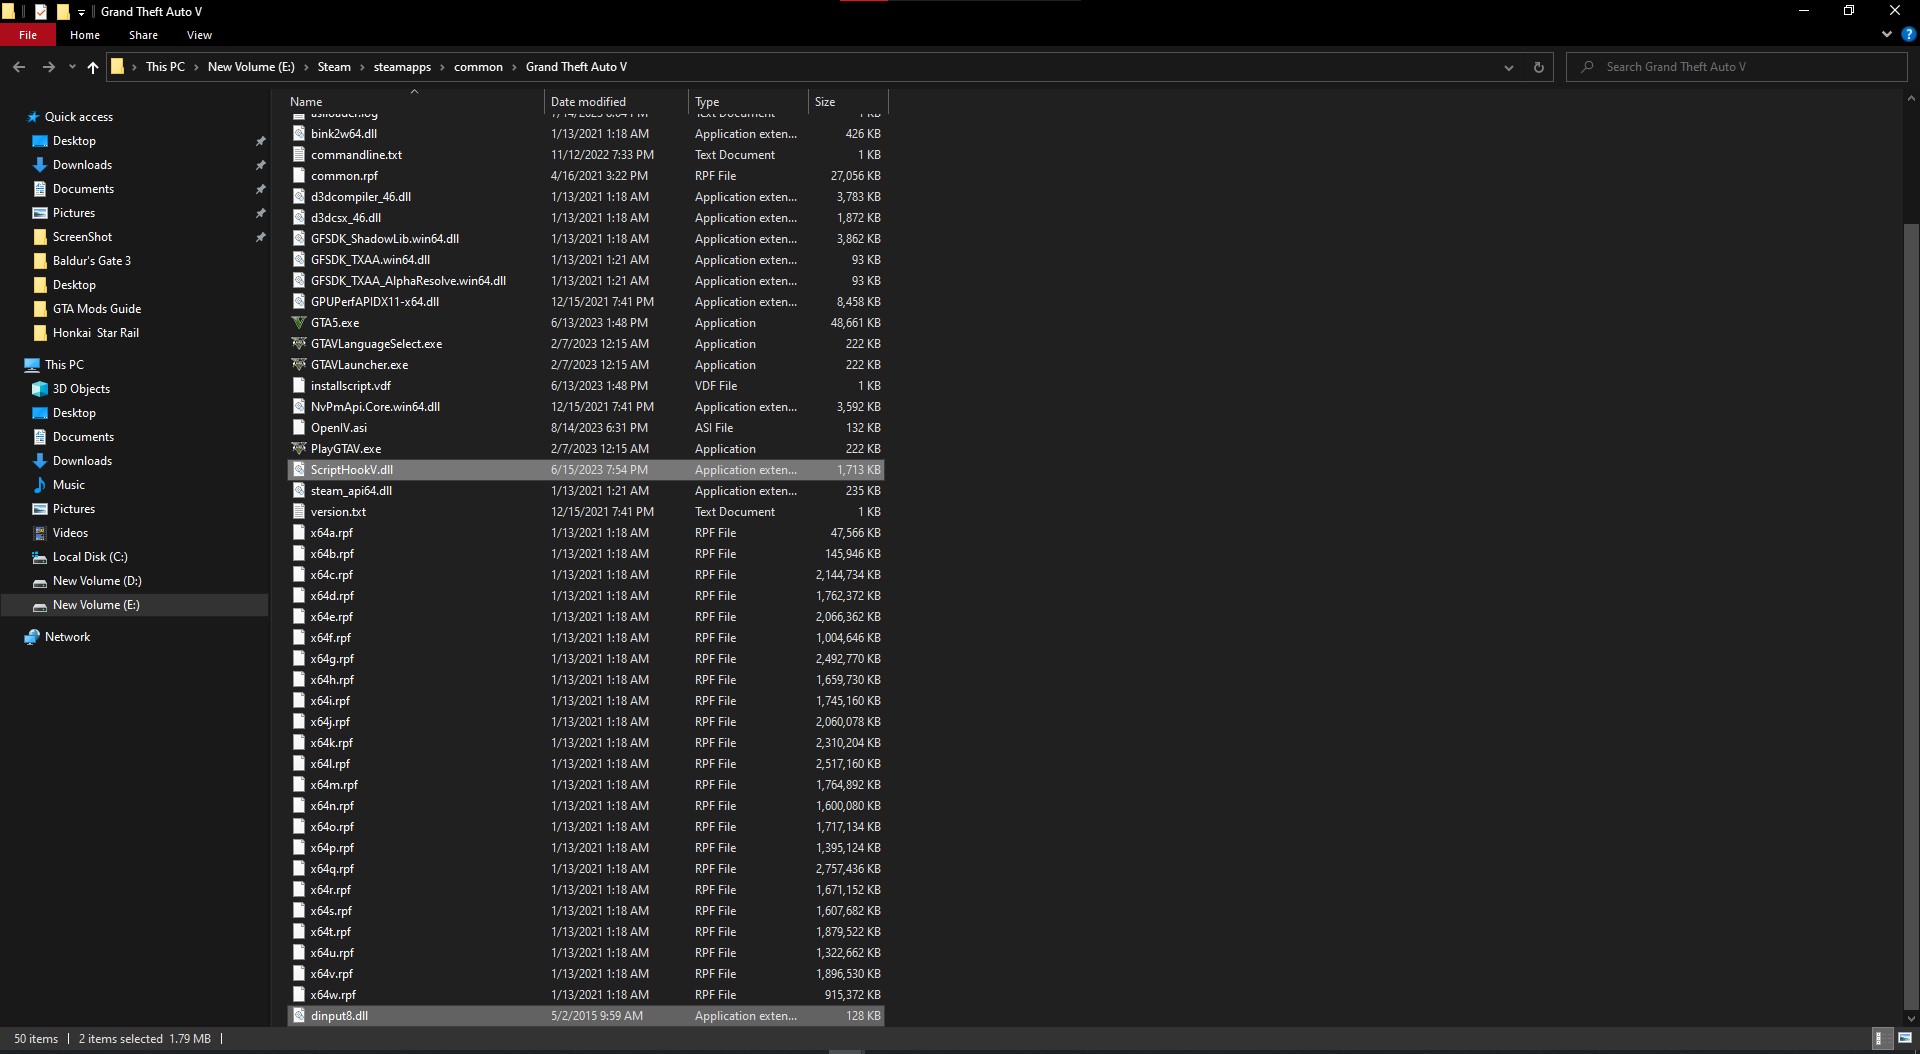
Copy both dinput8.dll and ScriptHookV.dll files to your GTA 5 game directory. You can do it by going to the directory or dragging and dropping it in your Open IV, which always opens up with the game directory at the forefront. Script Hook V is now installed.
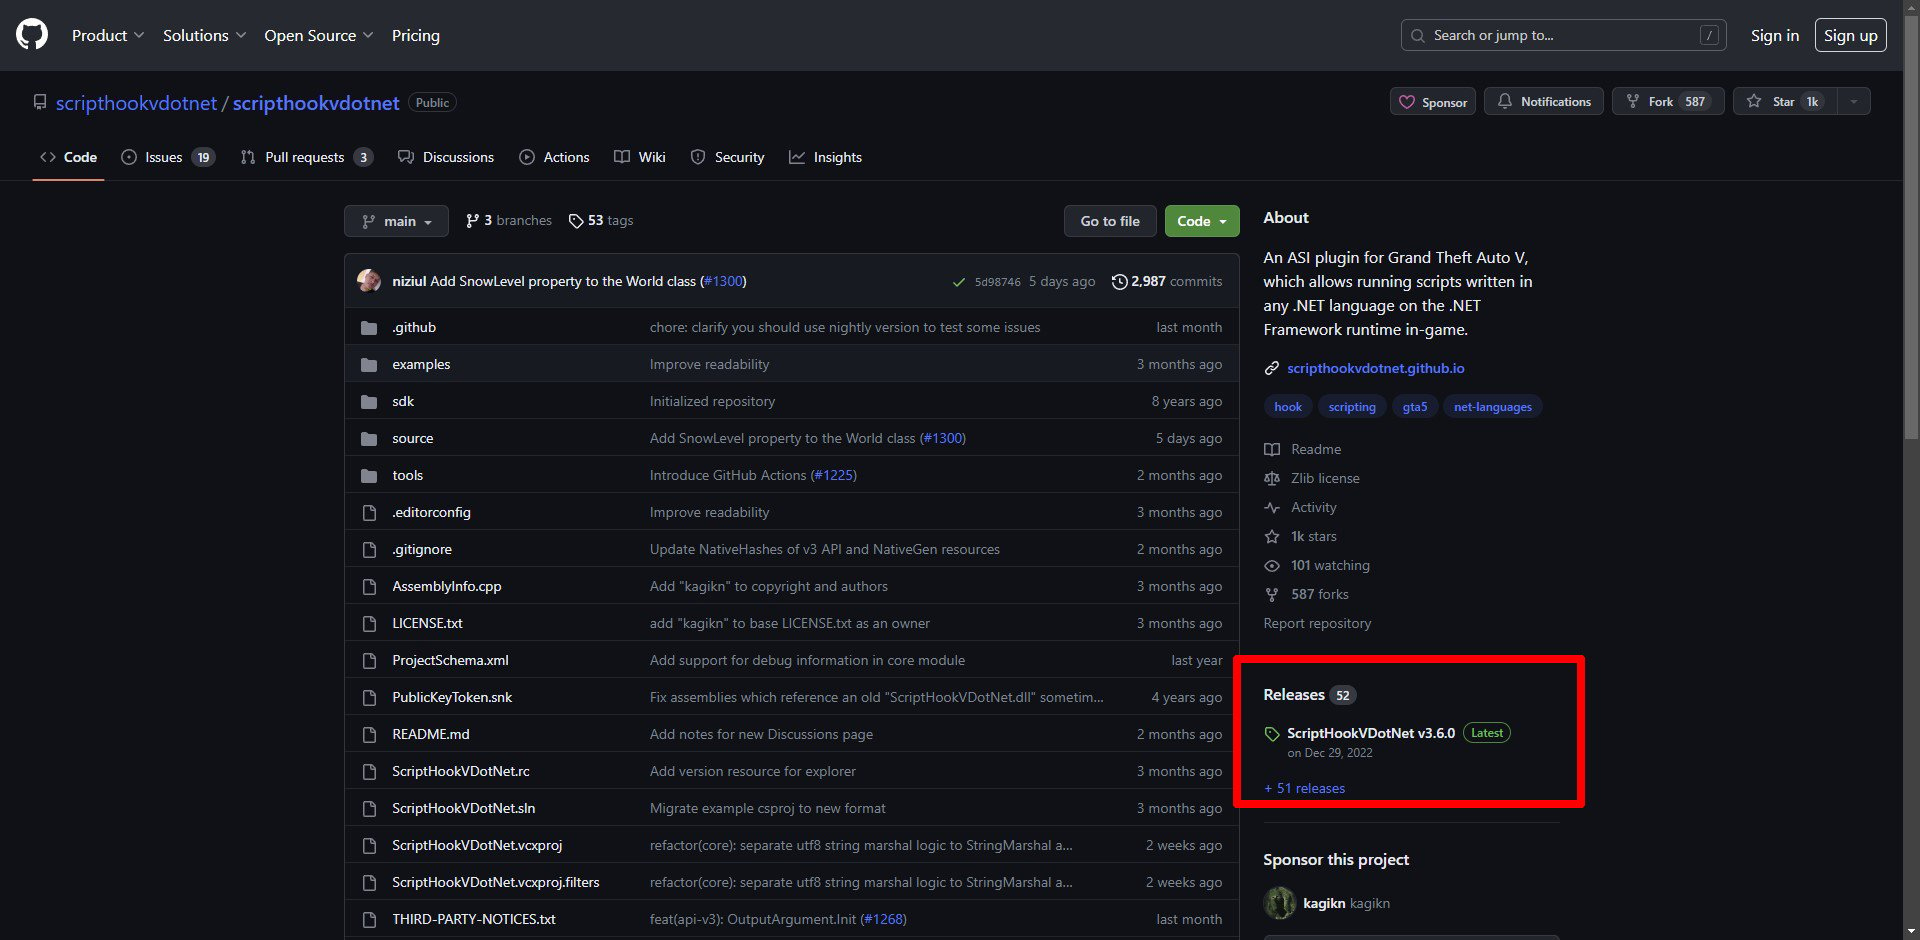
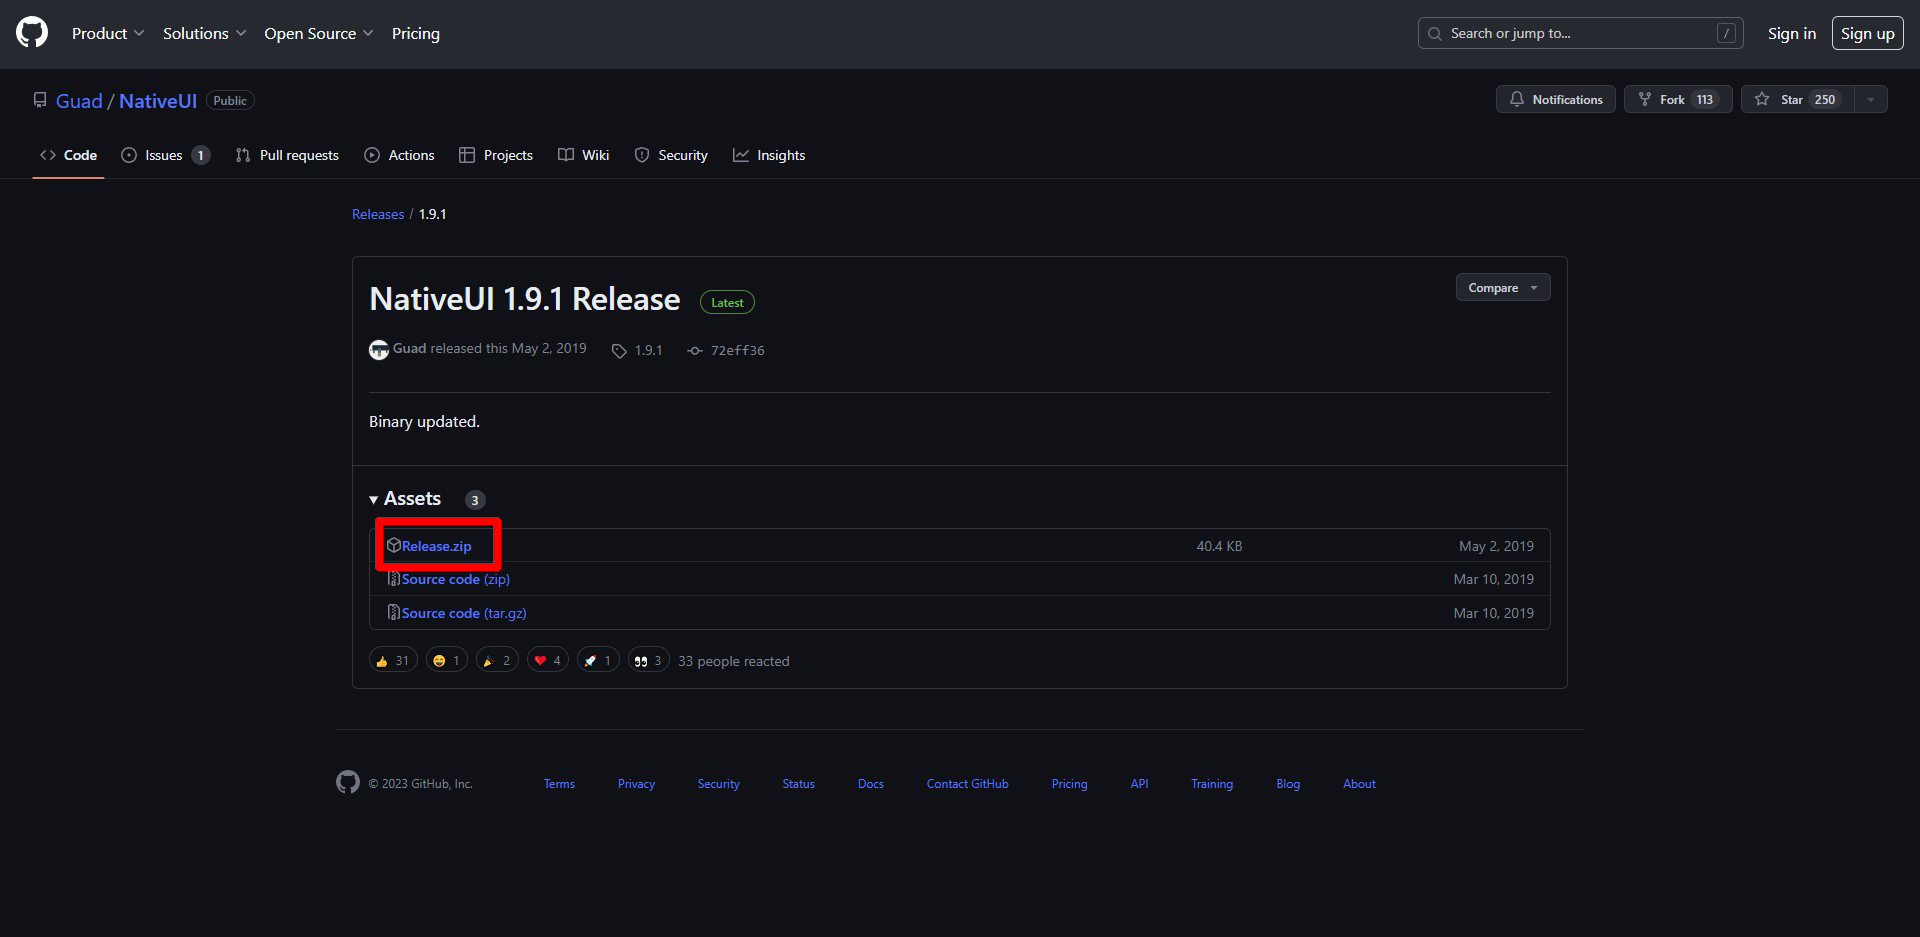
Next, you need to install ScriptHookVDotNet. You can download it from the official Github. When you visit the link, look at the right side of the page to find the latest release.
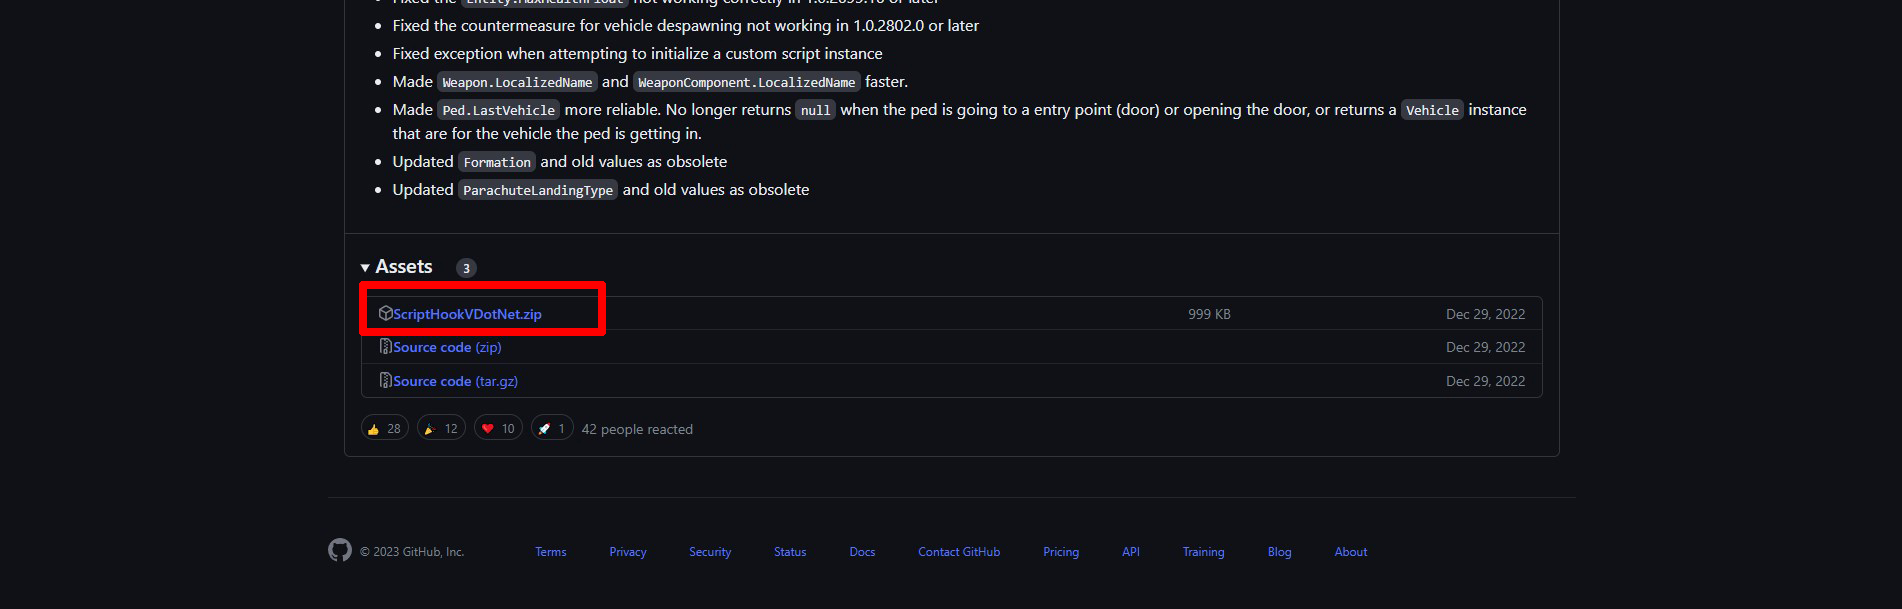
Go to the latest release page, scroll down, and download the ScriptHookVDotNet.zip file.
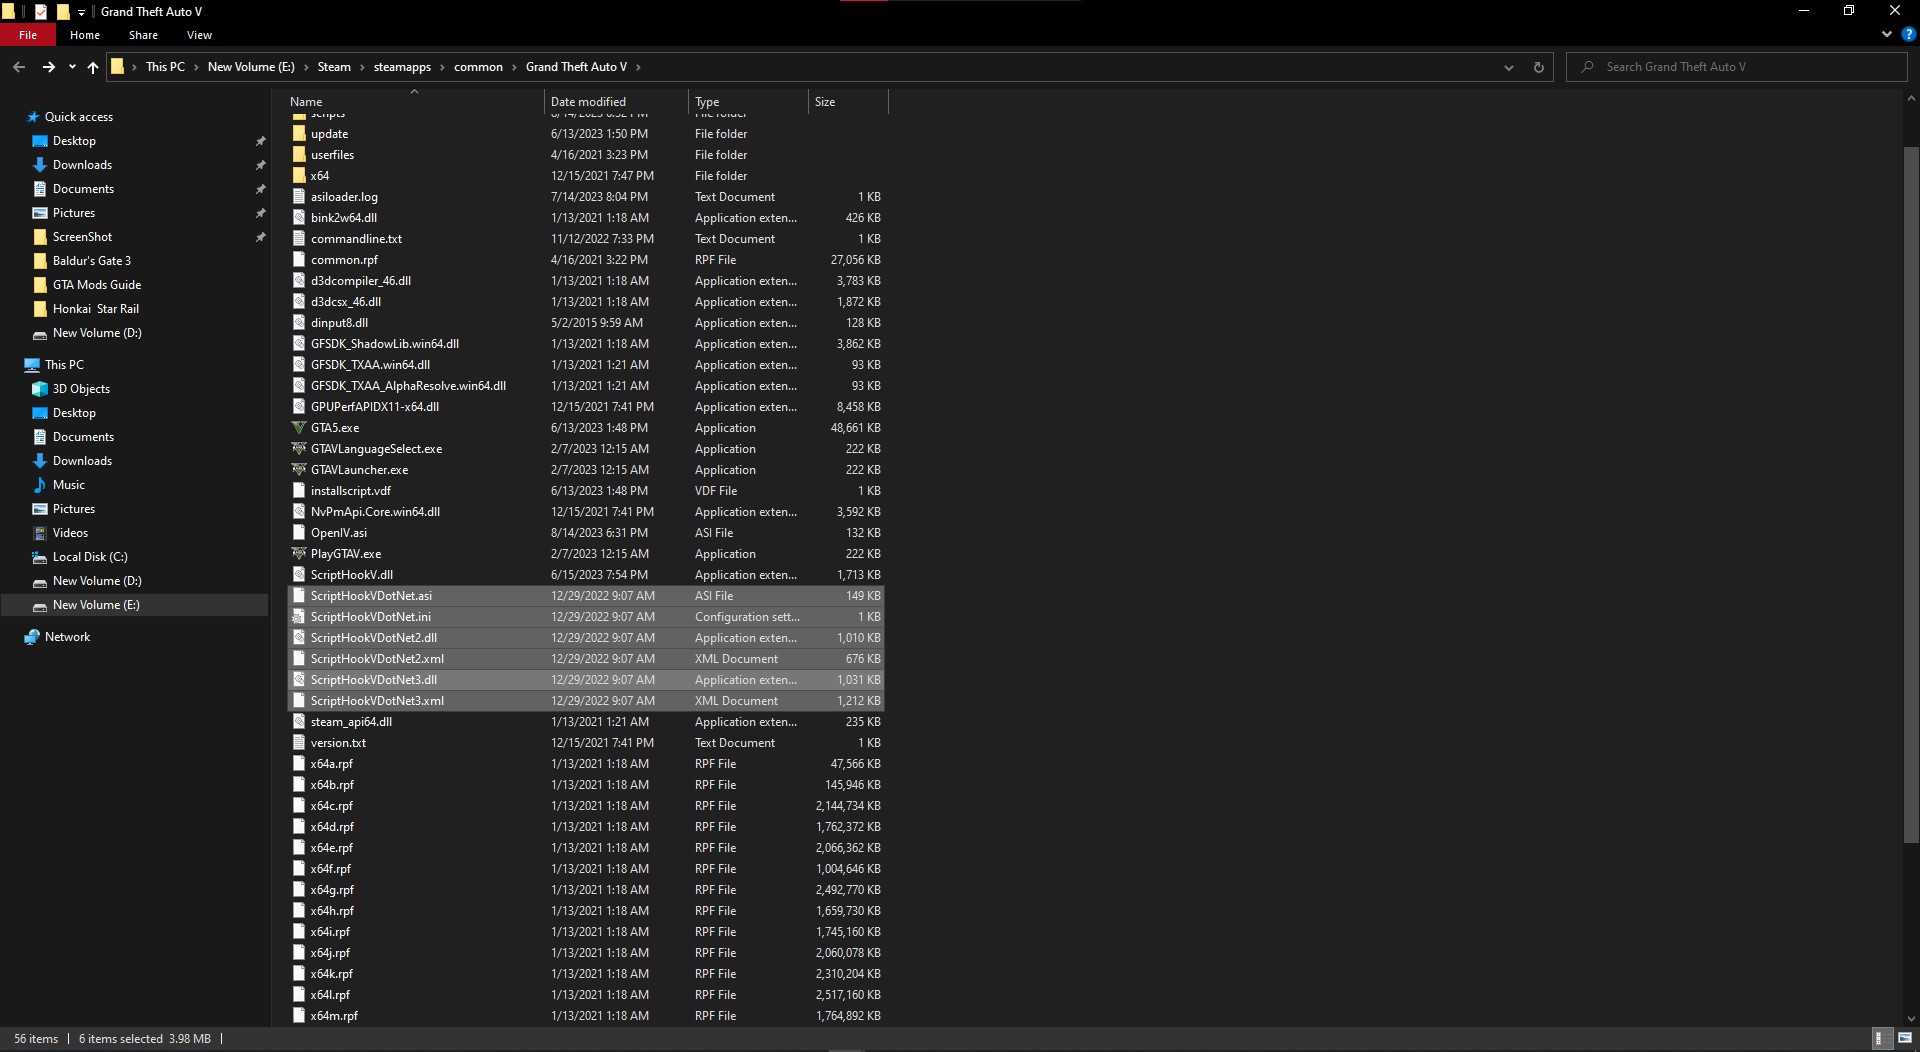
Extract the content of the zip file and copy them to your game directory. You will see around six files with .xml, .dll, and .asi extensions.
Now we will download NativeUI. Native UI is a ScriptHookVDotNet based library that allows modders to create a Rockstar Games-like user interface for a seamless in-game menu experience.
NativeUI can also be downloaded from the official Github. Click on the Release.zip file to download NativeUI.
Extract the files and copy NativeUI.dll and NativeUI.xml files to the 'scripts' folder you created earlier inside the GTA 5 game directory.
Finally, we can install a better trainer called MenyooSP. It has an excellent interface and an easy-to-use menu with an option to spawn custom content based on the mods you install in the future. It makes it very convenient to access the modded content altogether.
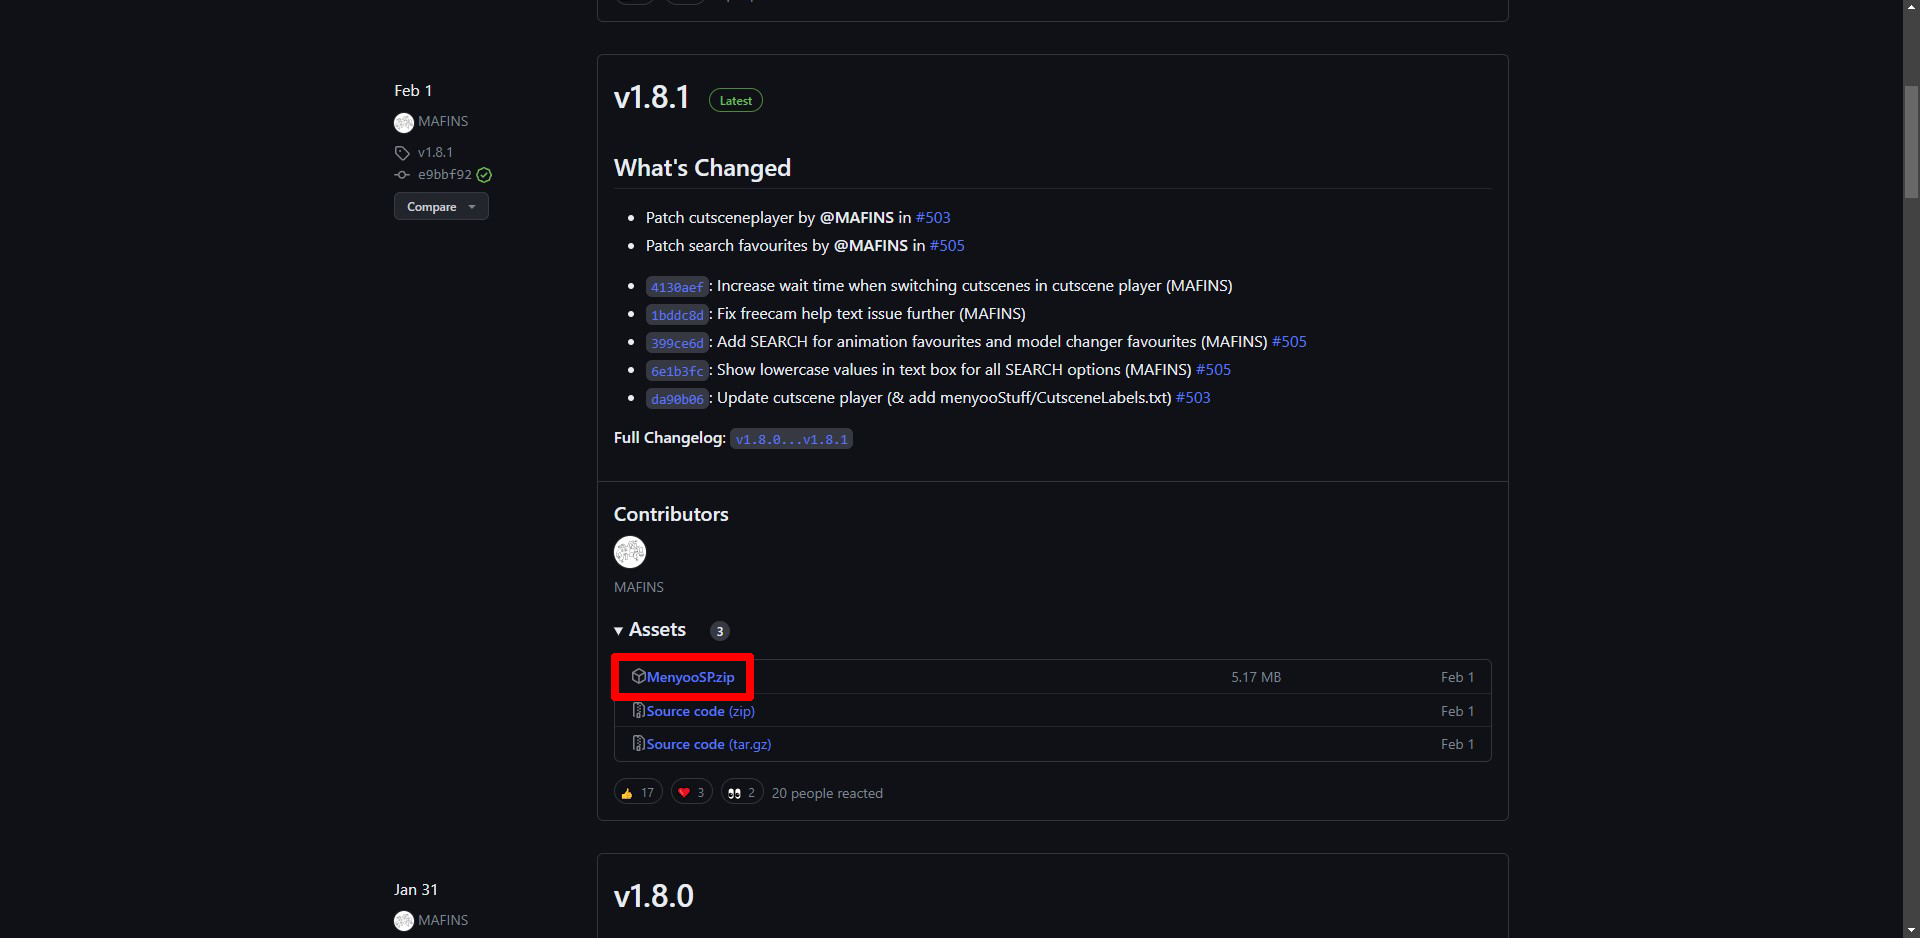
The updated version of MenyooSP is also found on the official Github. Click on the MenyooSP.zip file to download it.
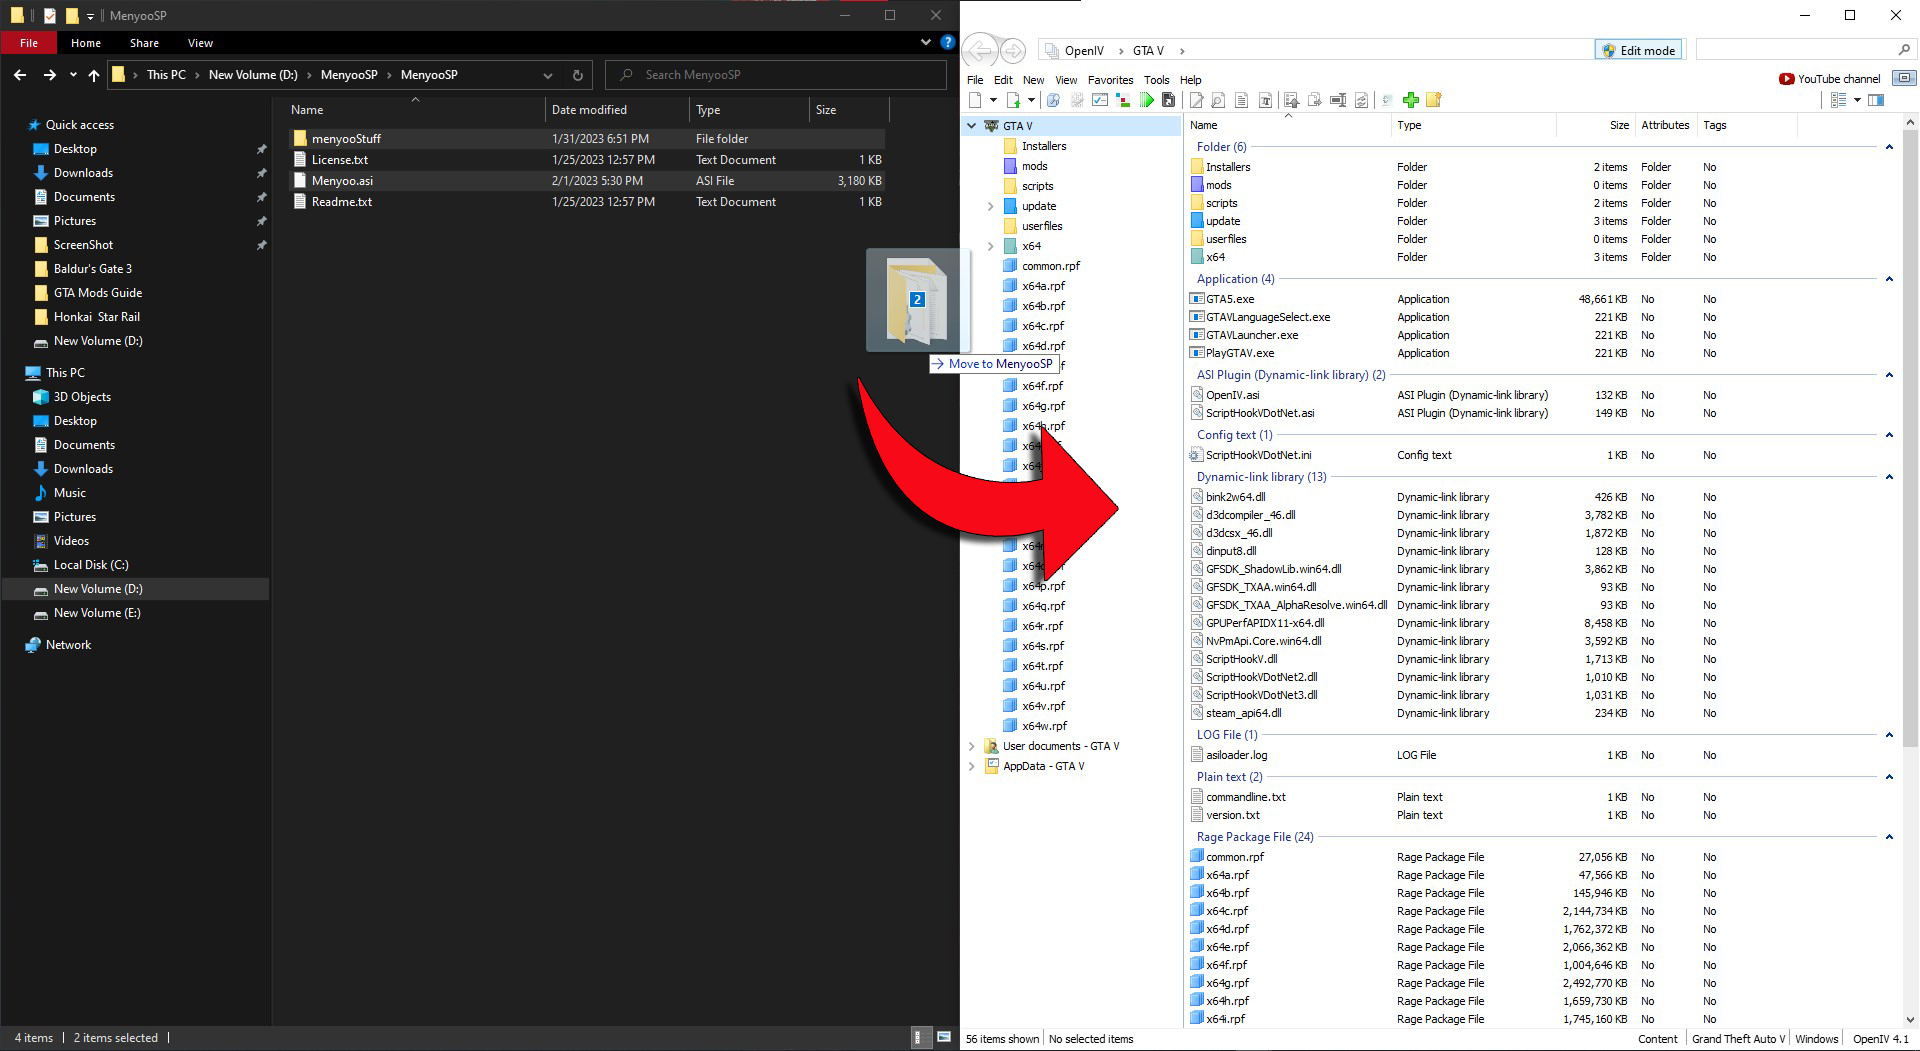
Extract the files and copy the menyooStuff folder and Menyoo.asi to your GTA 5 game directory. Again, you can do this by going to the directory yourself or through Open IV (as long as you're in edit mode in Open IV).
Installing Mods
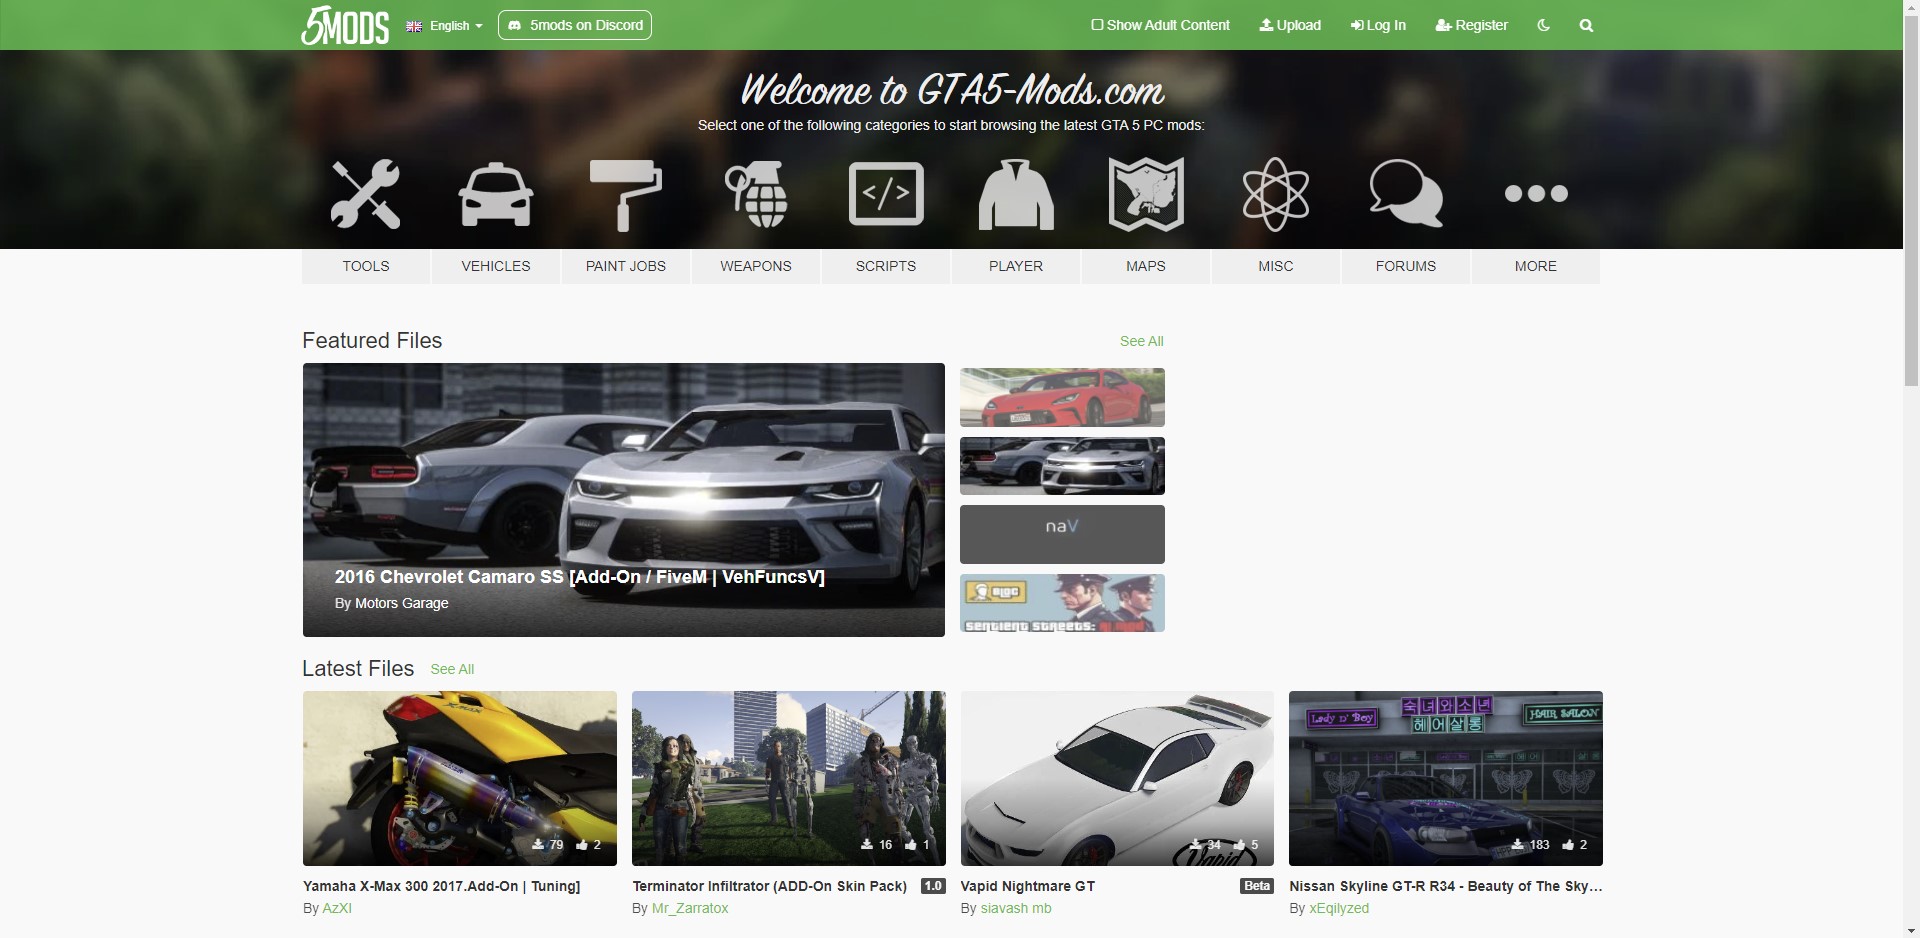
Now that our Open IV is ready and set to go, we can continue with the mods. There are several websites where you can find thousands of mods. I recommend the GTA-5 mods website as they have one of the largest libraries of all types of mods, including scripts, weapons, vehicles, and more!
Scripts
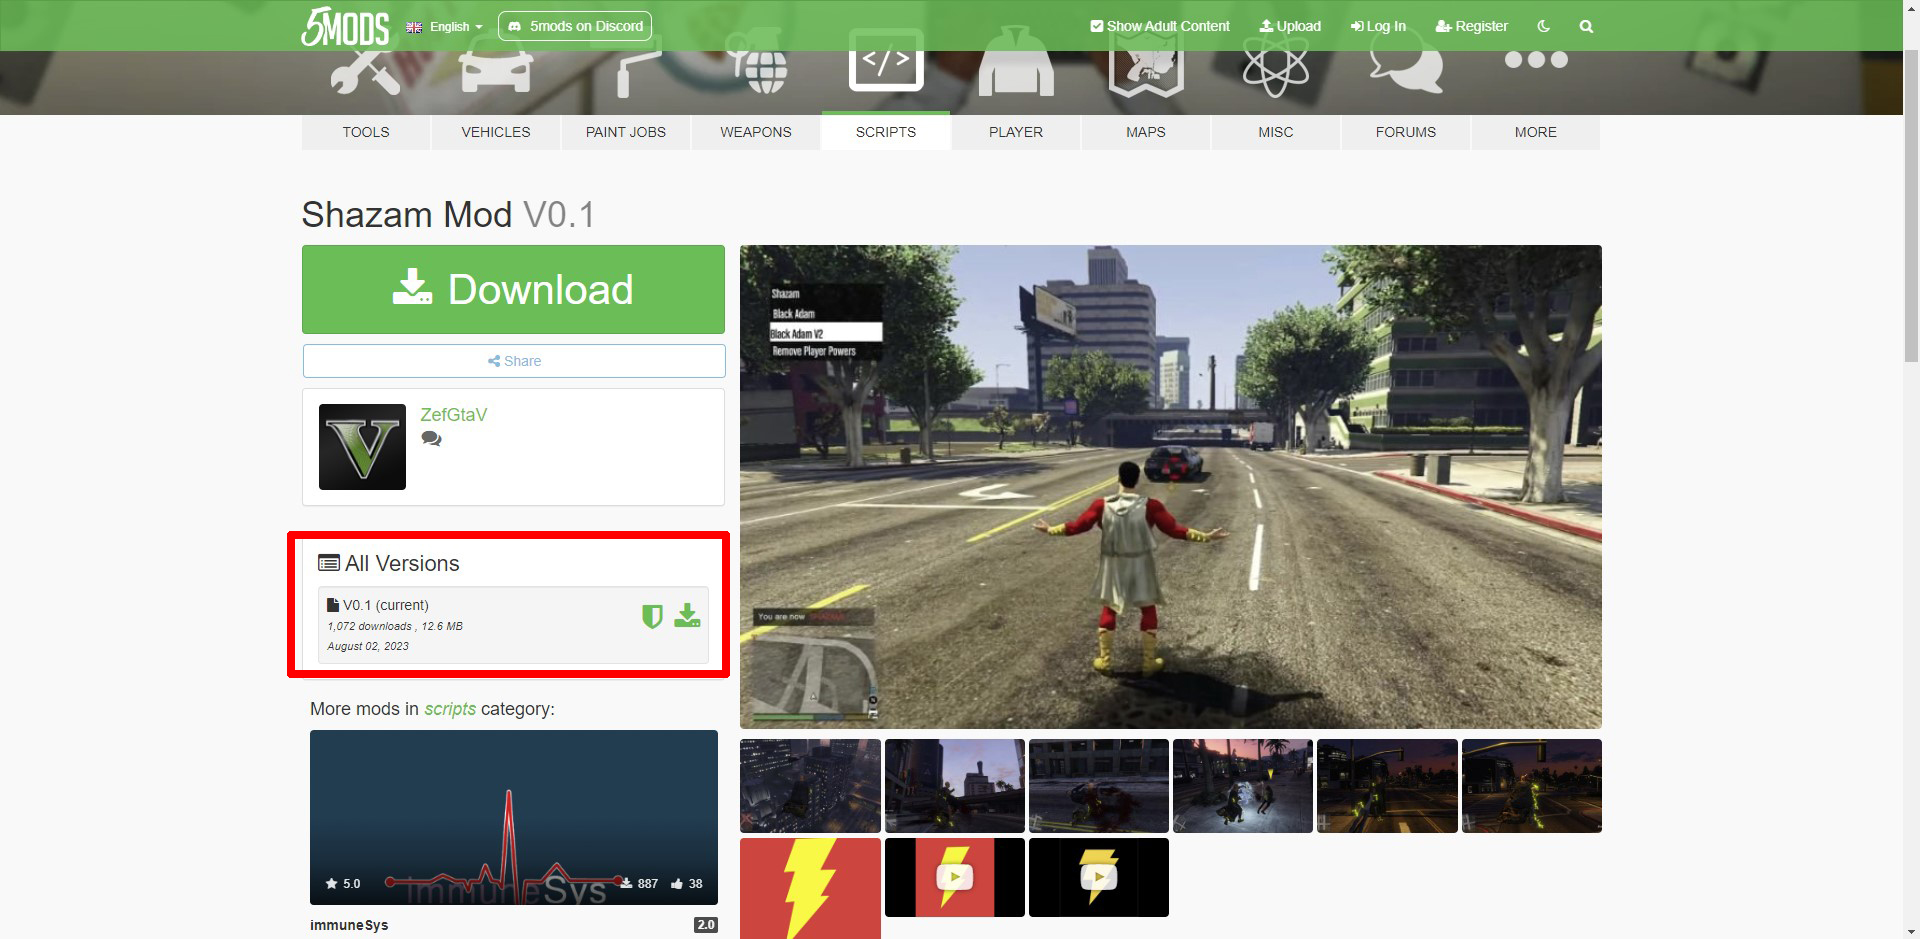
Let's begin by installing the most commonly sought-after mod type, the scripts. The scripts are usually fun and add new things to your game. Whether you're interested in jumping from building to building as Spider-Man or flying over Los Santos as Superman, scripts allows you to do all that. As an example for this guide, we will install the Shazam mod to get the Shazam superpowers.
One important thing to remember when downloading the mods from the GTA-5 mods website is to always check the current version and the date it was last updated. Always use the "current version" download link instead of the big green download button.
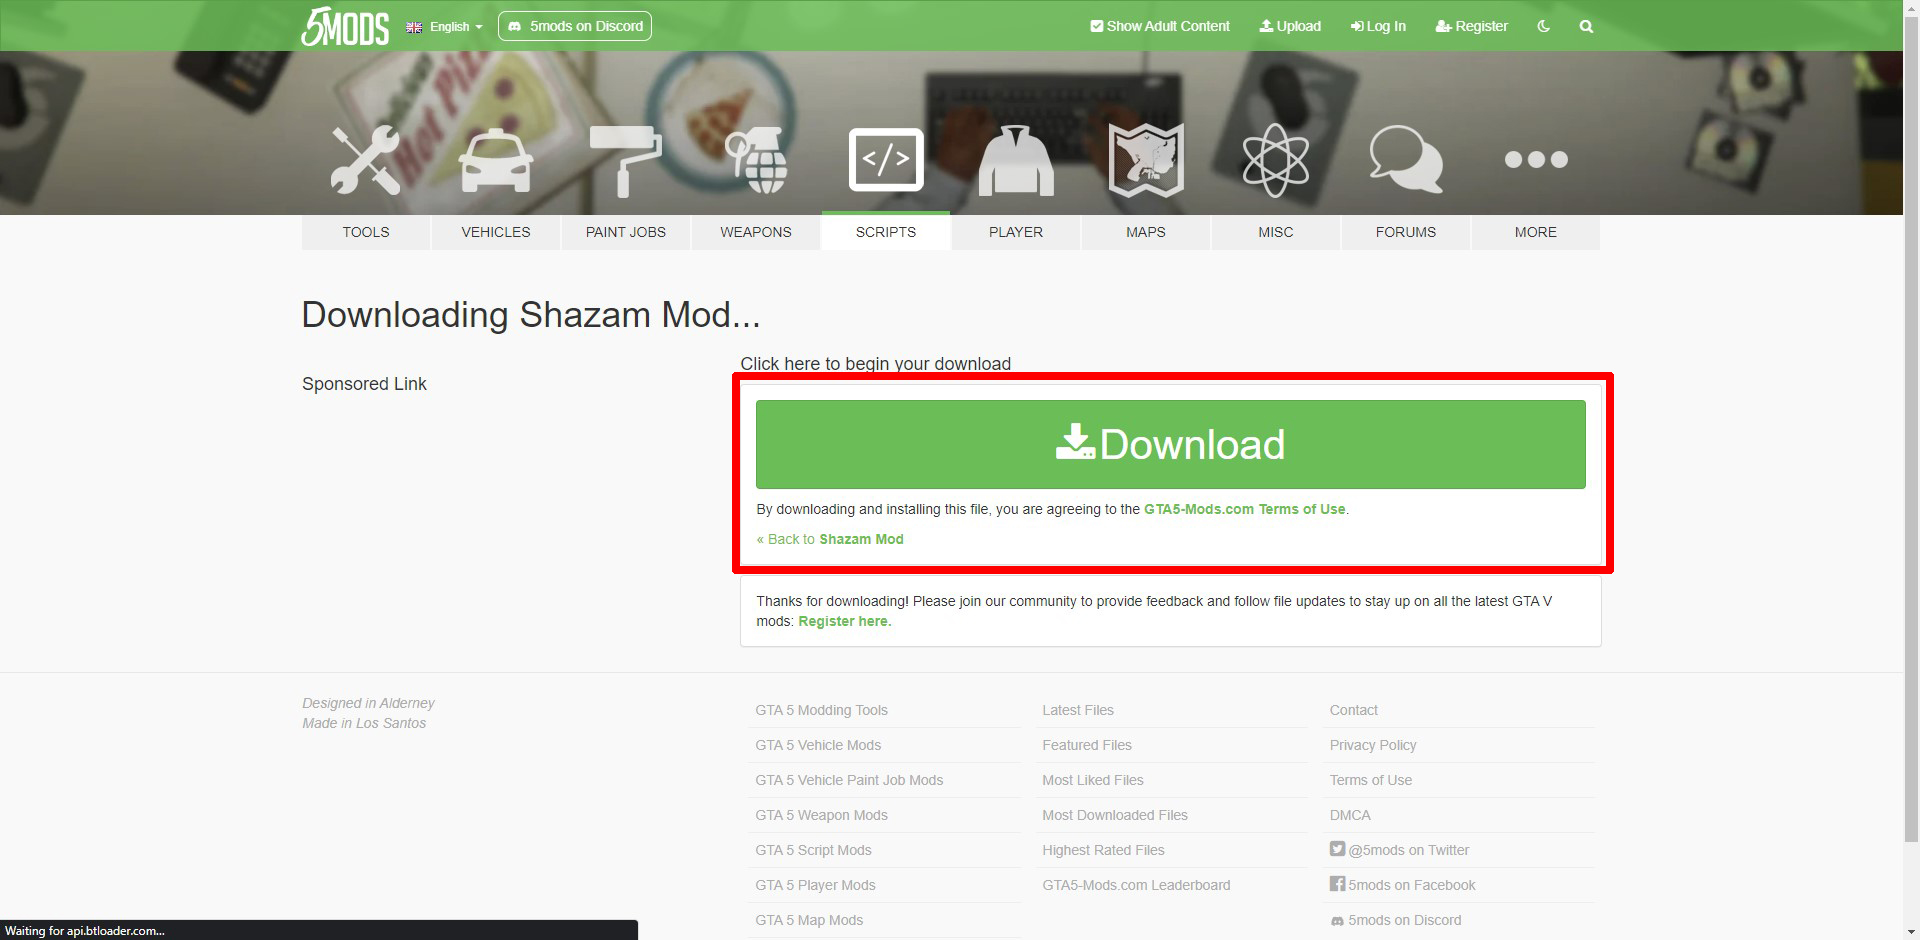
It will redirect you to another page with a green download button, which is safe to click and download.
It is also important to read the mod description, as it usually contains installation instructions. The instructions include the pathways and directories where certain files should go. If the mod description doesn't include any instructions, the downloaded .zip file always contains a read-me file with all the relevant instructions.
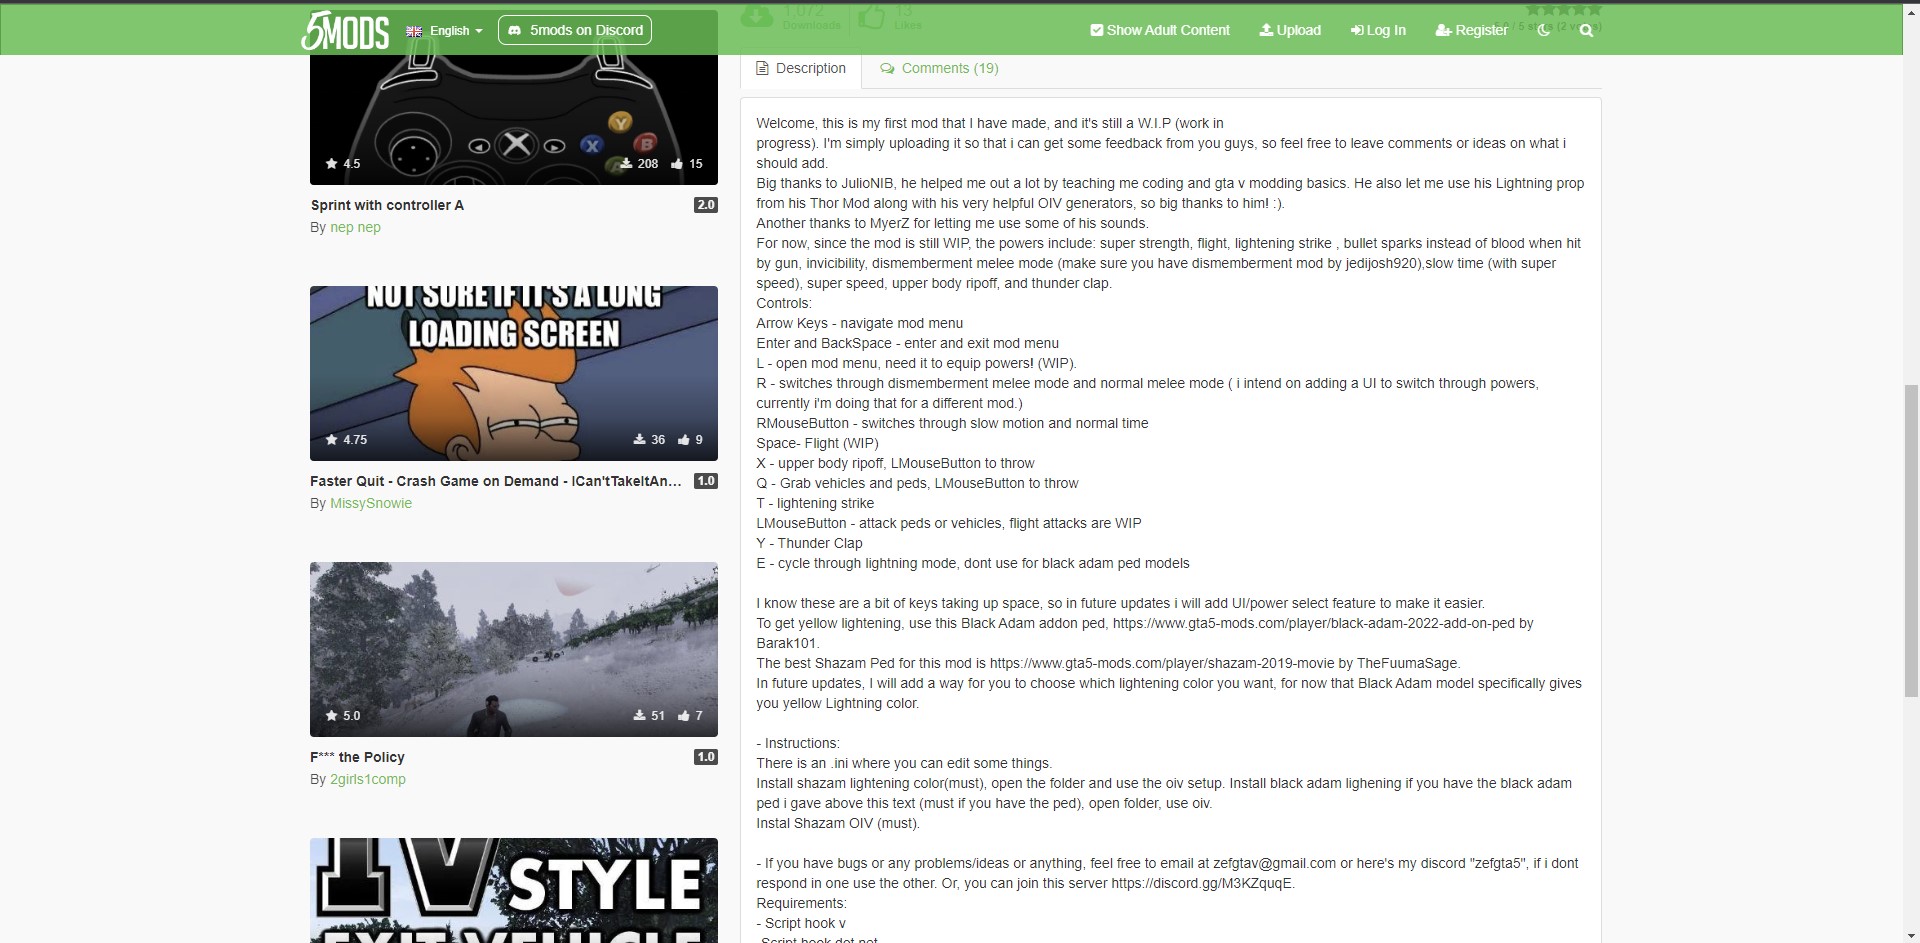
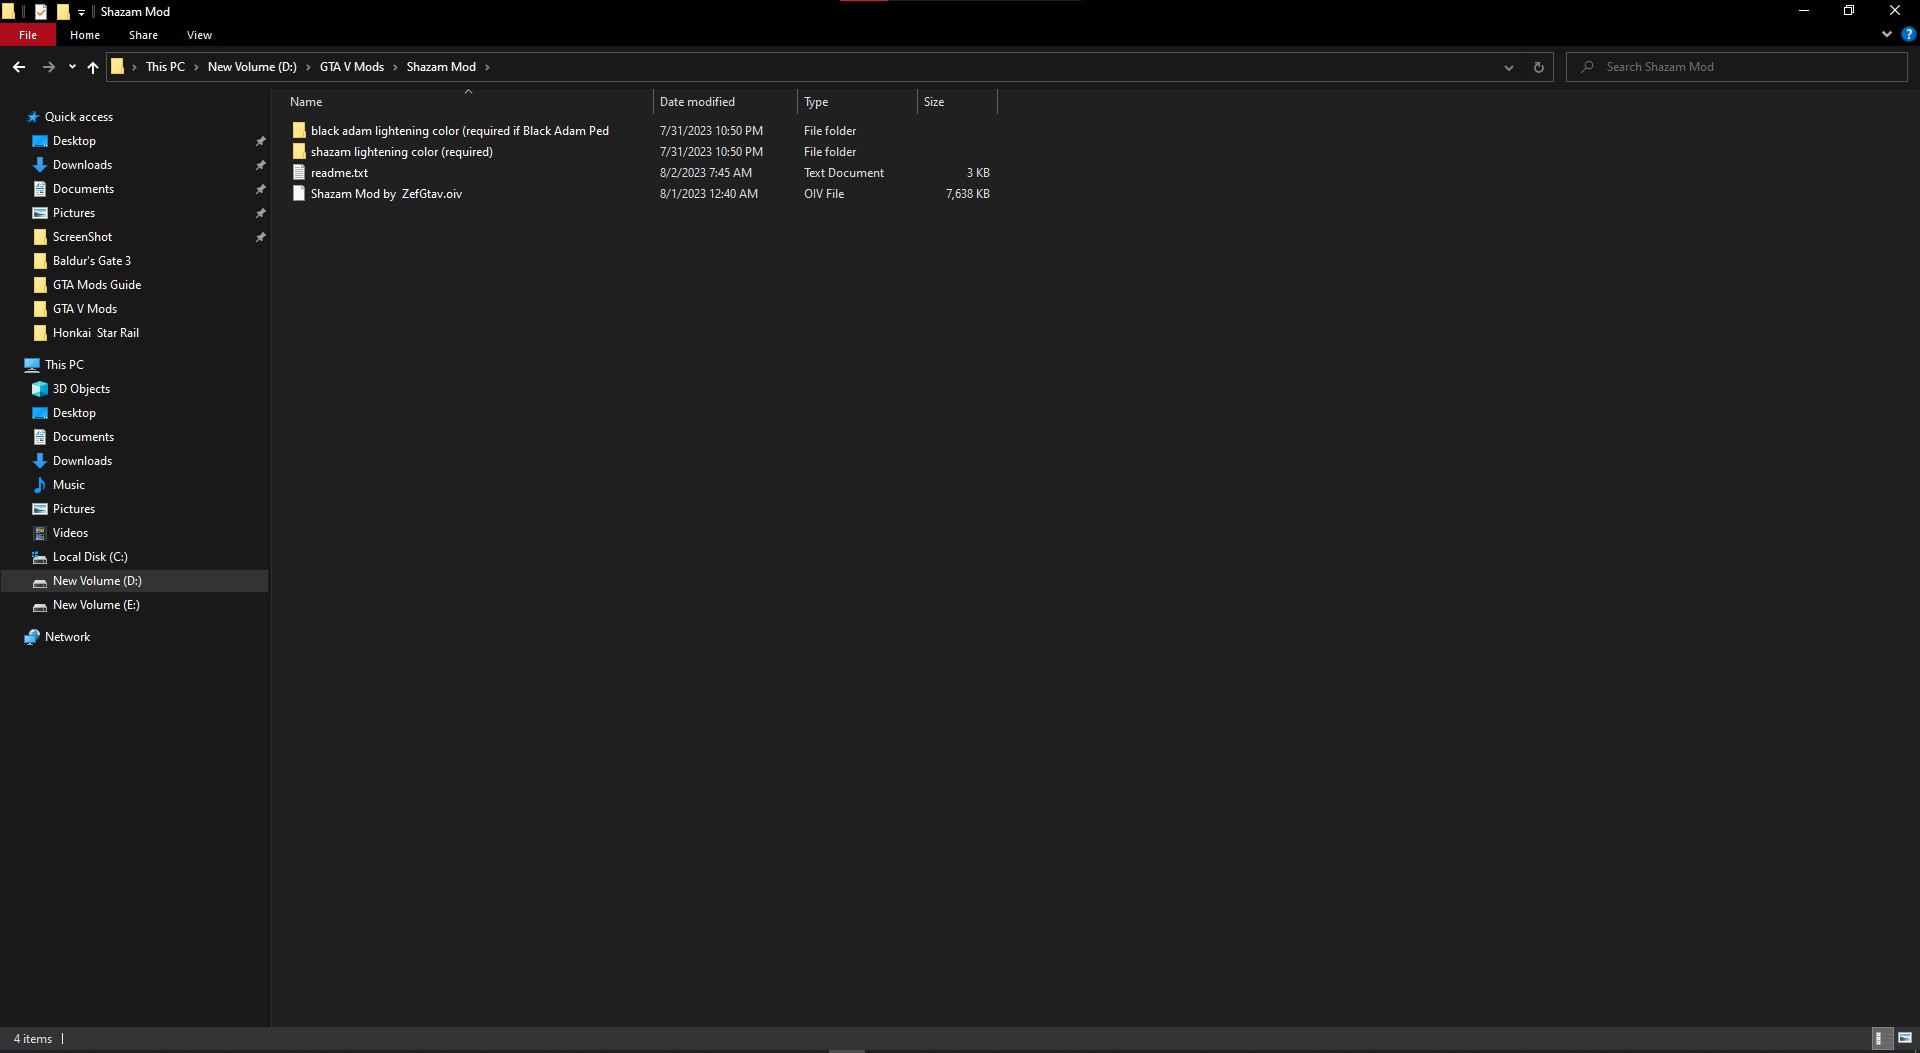
After downloading the .zip file and extracting its content, we see a bunch of files. Do not worry, as it will all make sense in a minute. According to the instructions given to us by the modder, we need to install the Shazam Lightning Color (which is a MUST, according to them) and Shazam Mod OIV (which is the main mod file by ZefGtav in the extracted folder). OIV is an extension of the files that can run using the Open IV program.
To install these .OIV files, you first need to open up your Open IV and go into edit mode by clicking on the 'Edit mode' at the top-right corner.
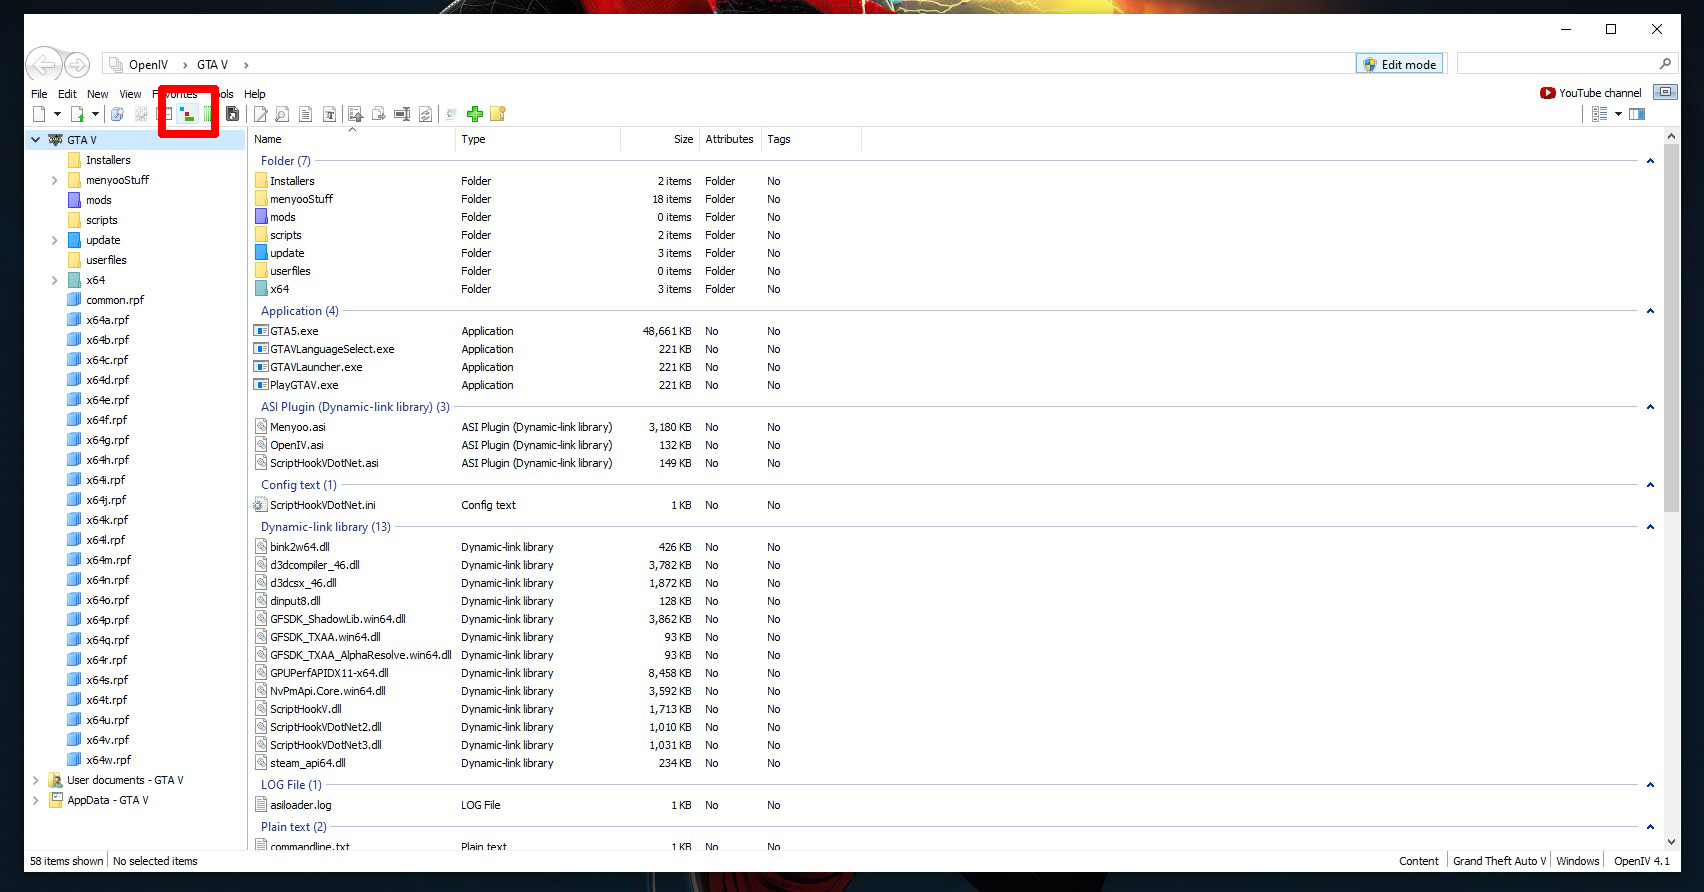
Next, open the Package Installer from the top-left corner (directly under Tools).
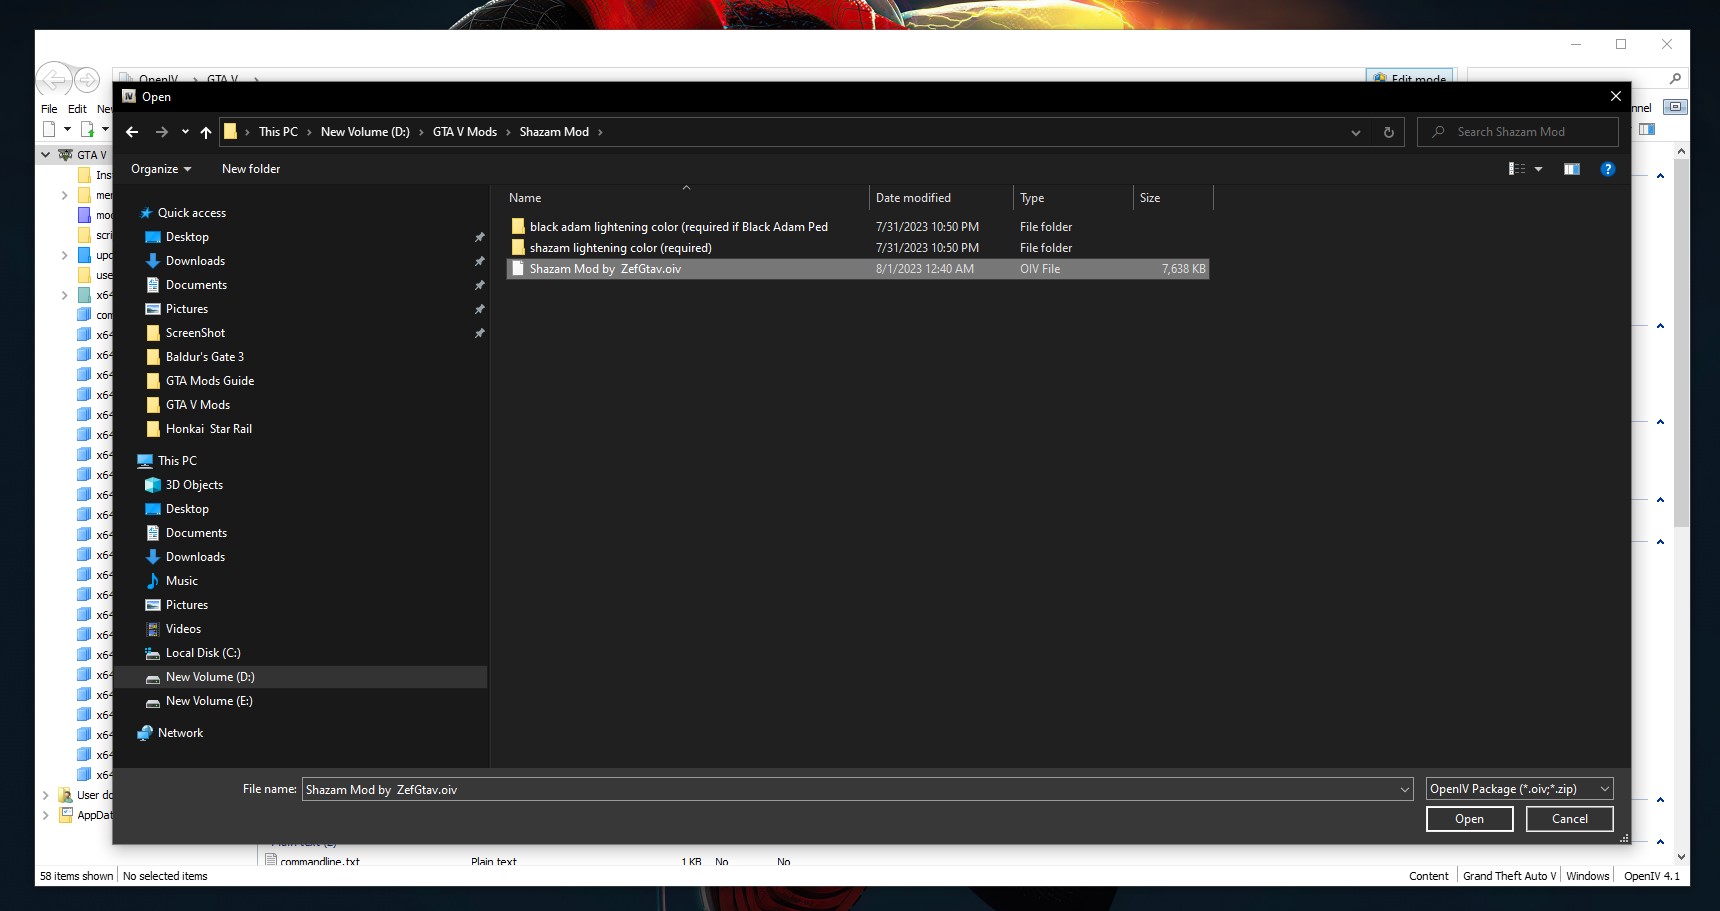
Navigate to your .OIV file and open it.
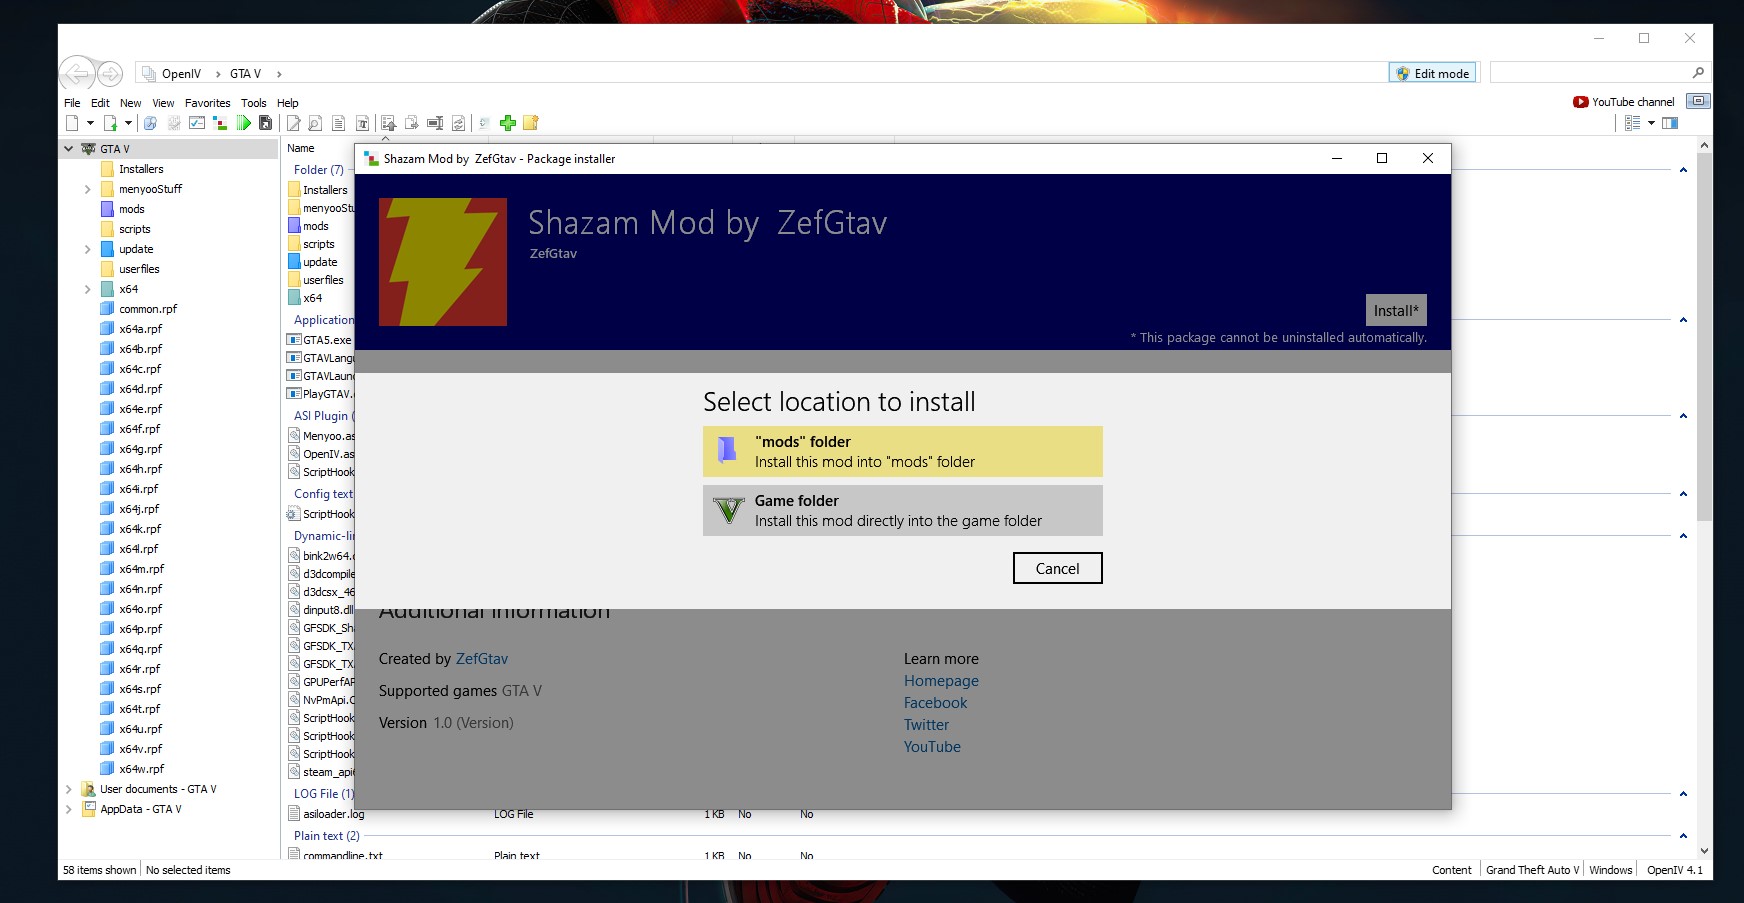
Once you open it, you will get an installation pop-up. Click on the install button to install the mod.
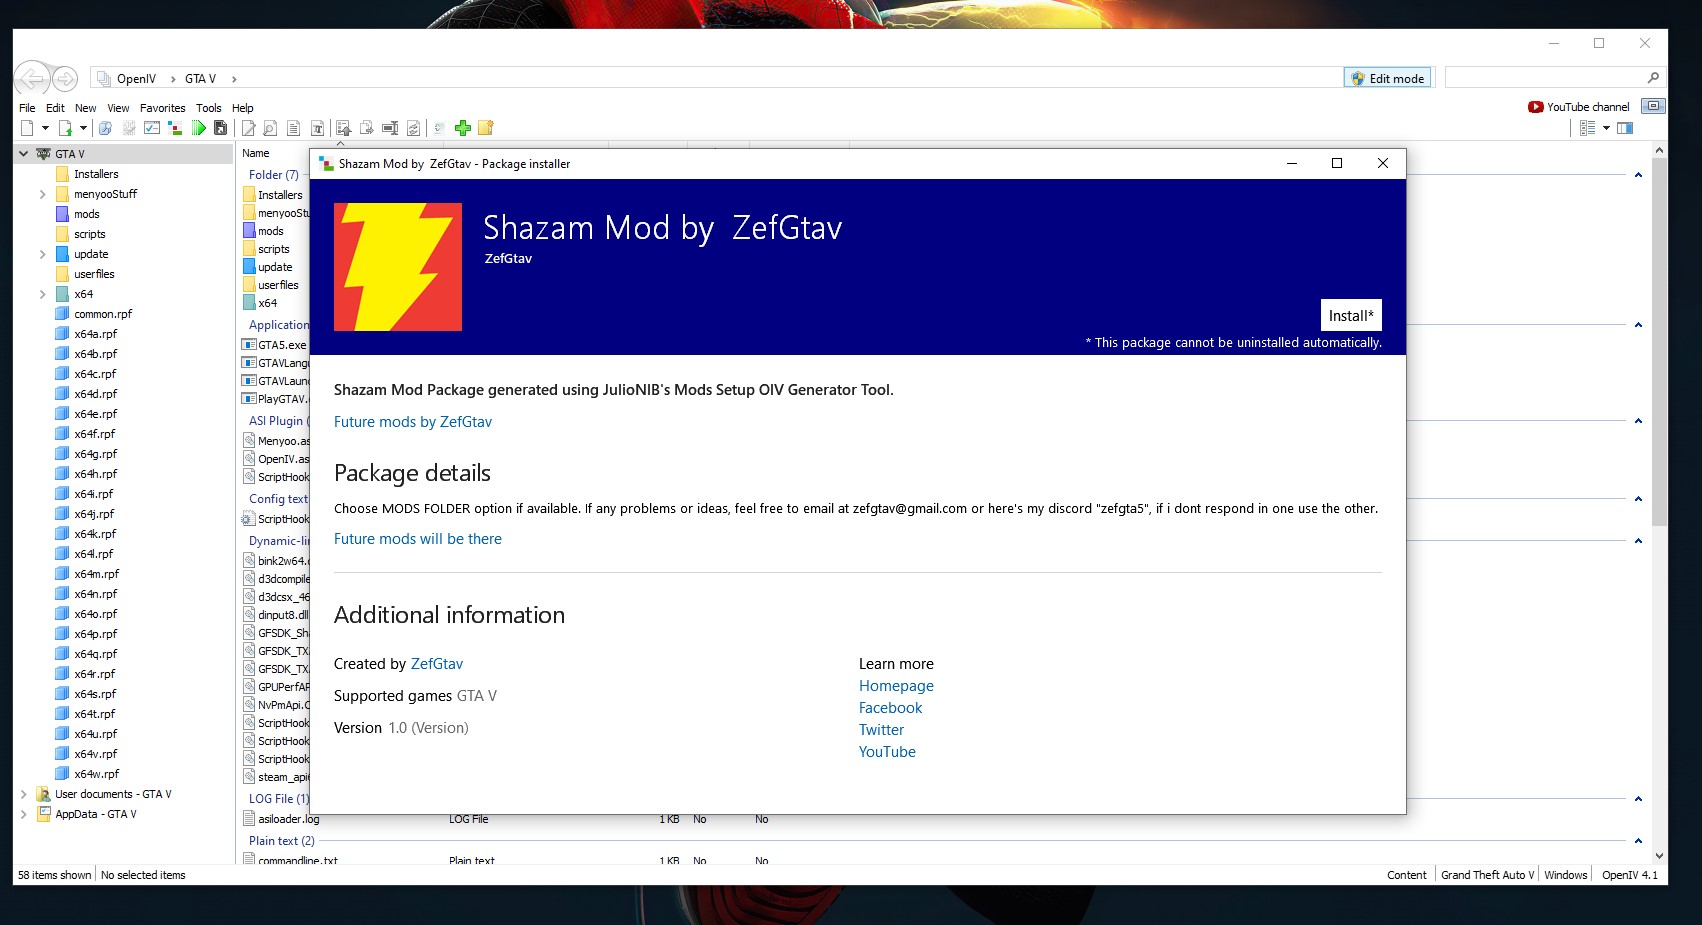
When you click on the install button, you will get an option to select the location to install the mod. Select the "mods" folder, not the "Game folder."
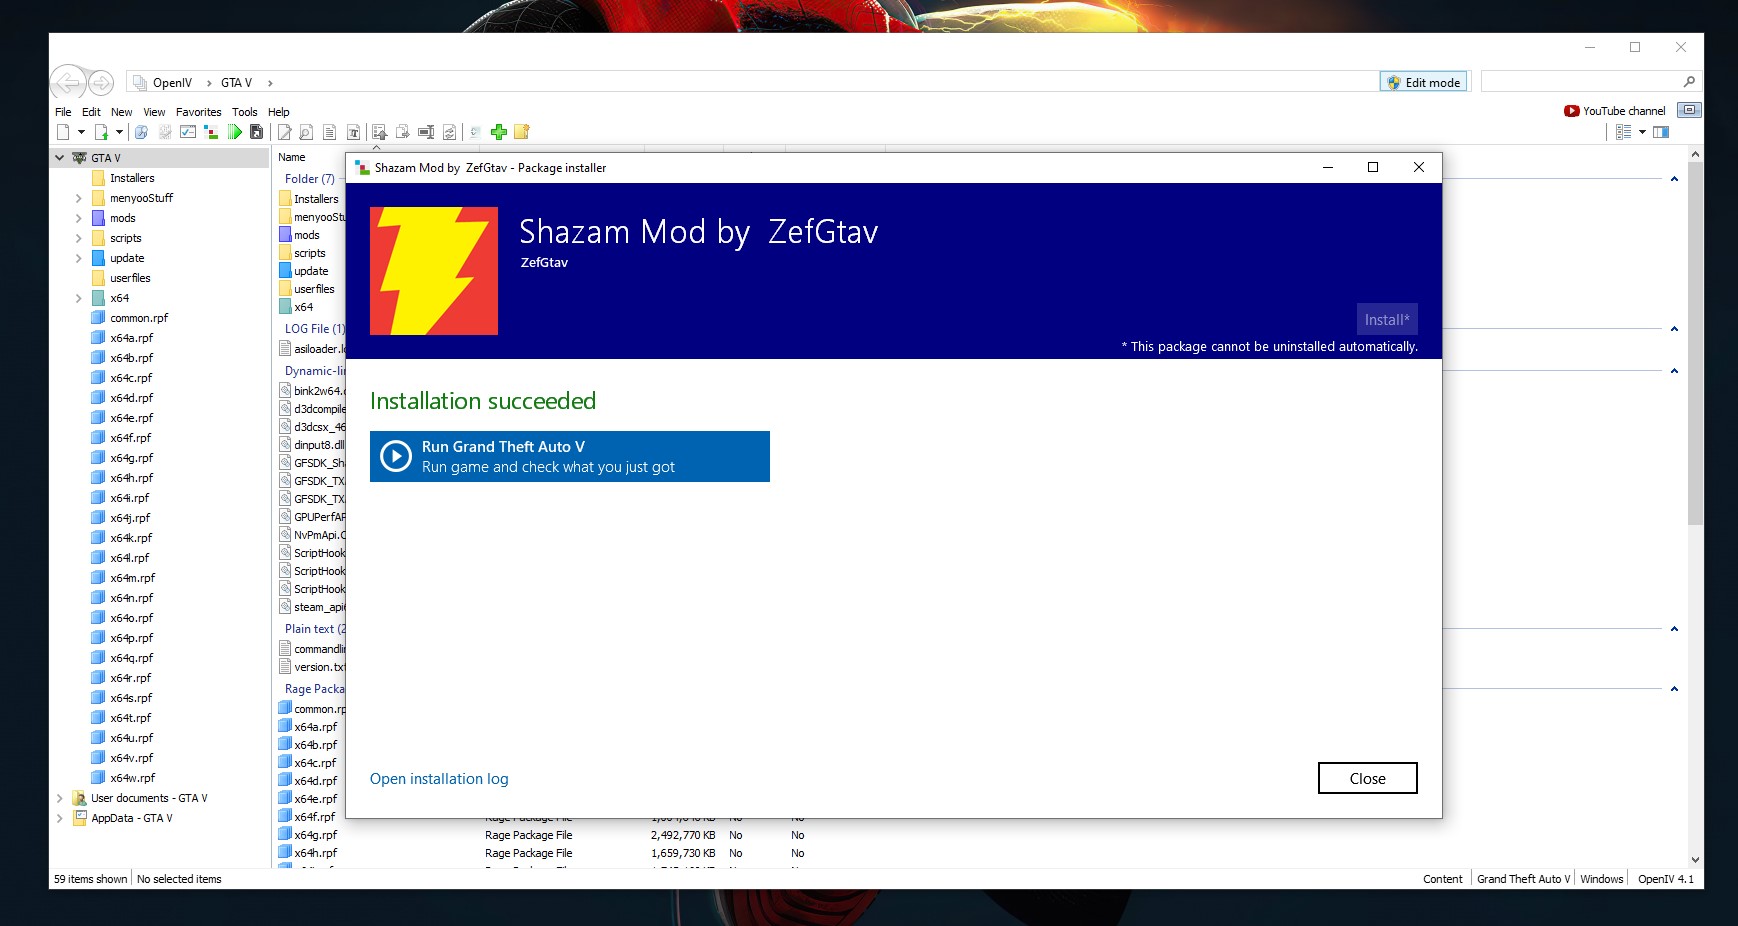
You will get a confirmation that the mod has been installed at the end. Once installed, do the same with the .OIV file inside the Shazam Lightning color folder. You can skip the Black Adam Lightning folder if you'd like, as this is just an example.
We can now go into the game and activate the Shazam mod. Once again, referring back to the modder's instruction manual, we can access the Shazam mod menu by pressing 'L' on our keyboard.
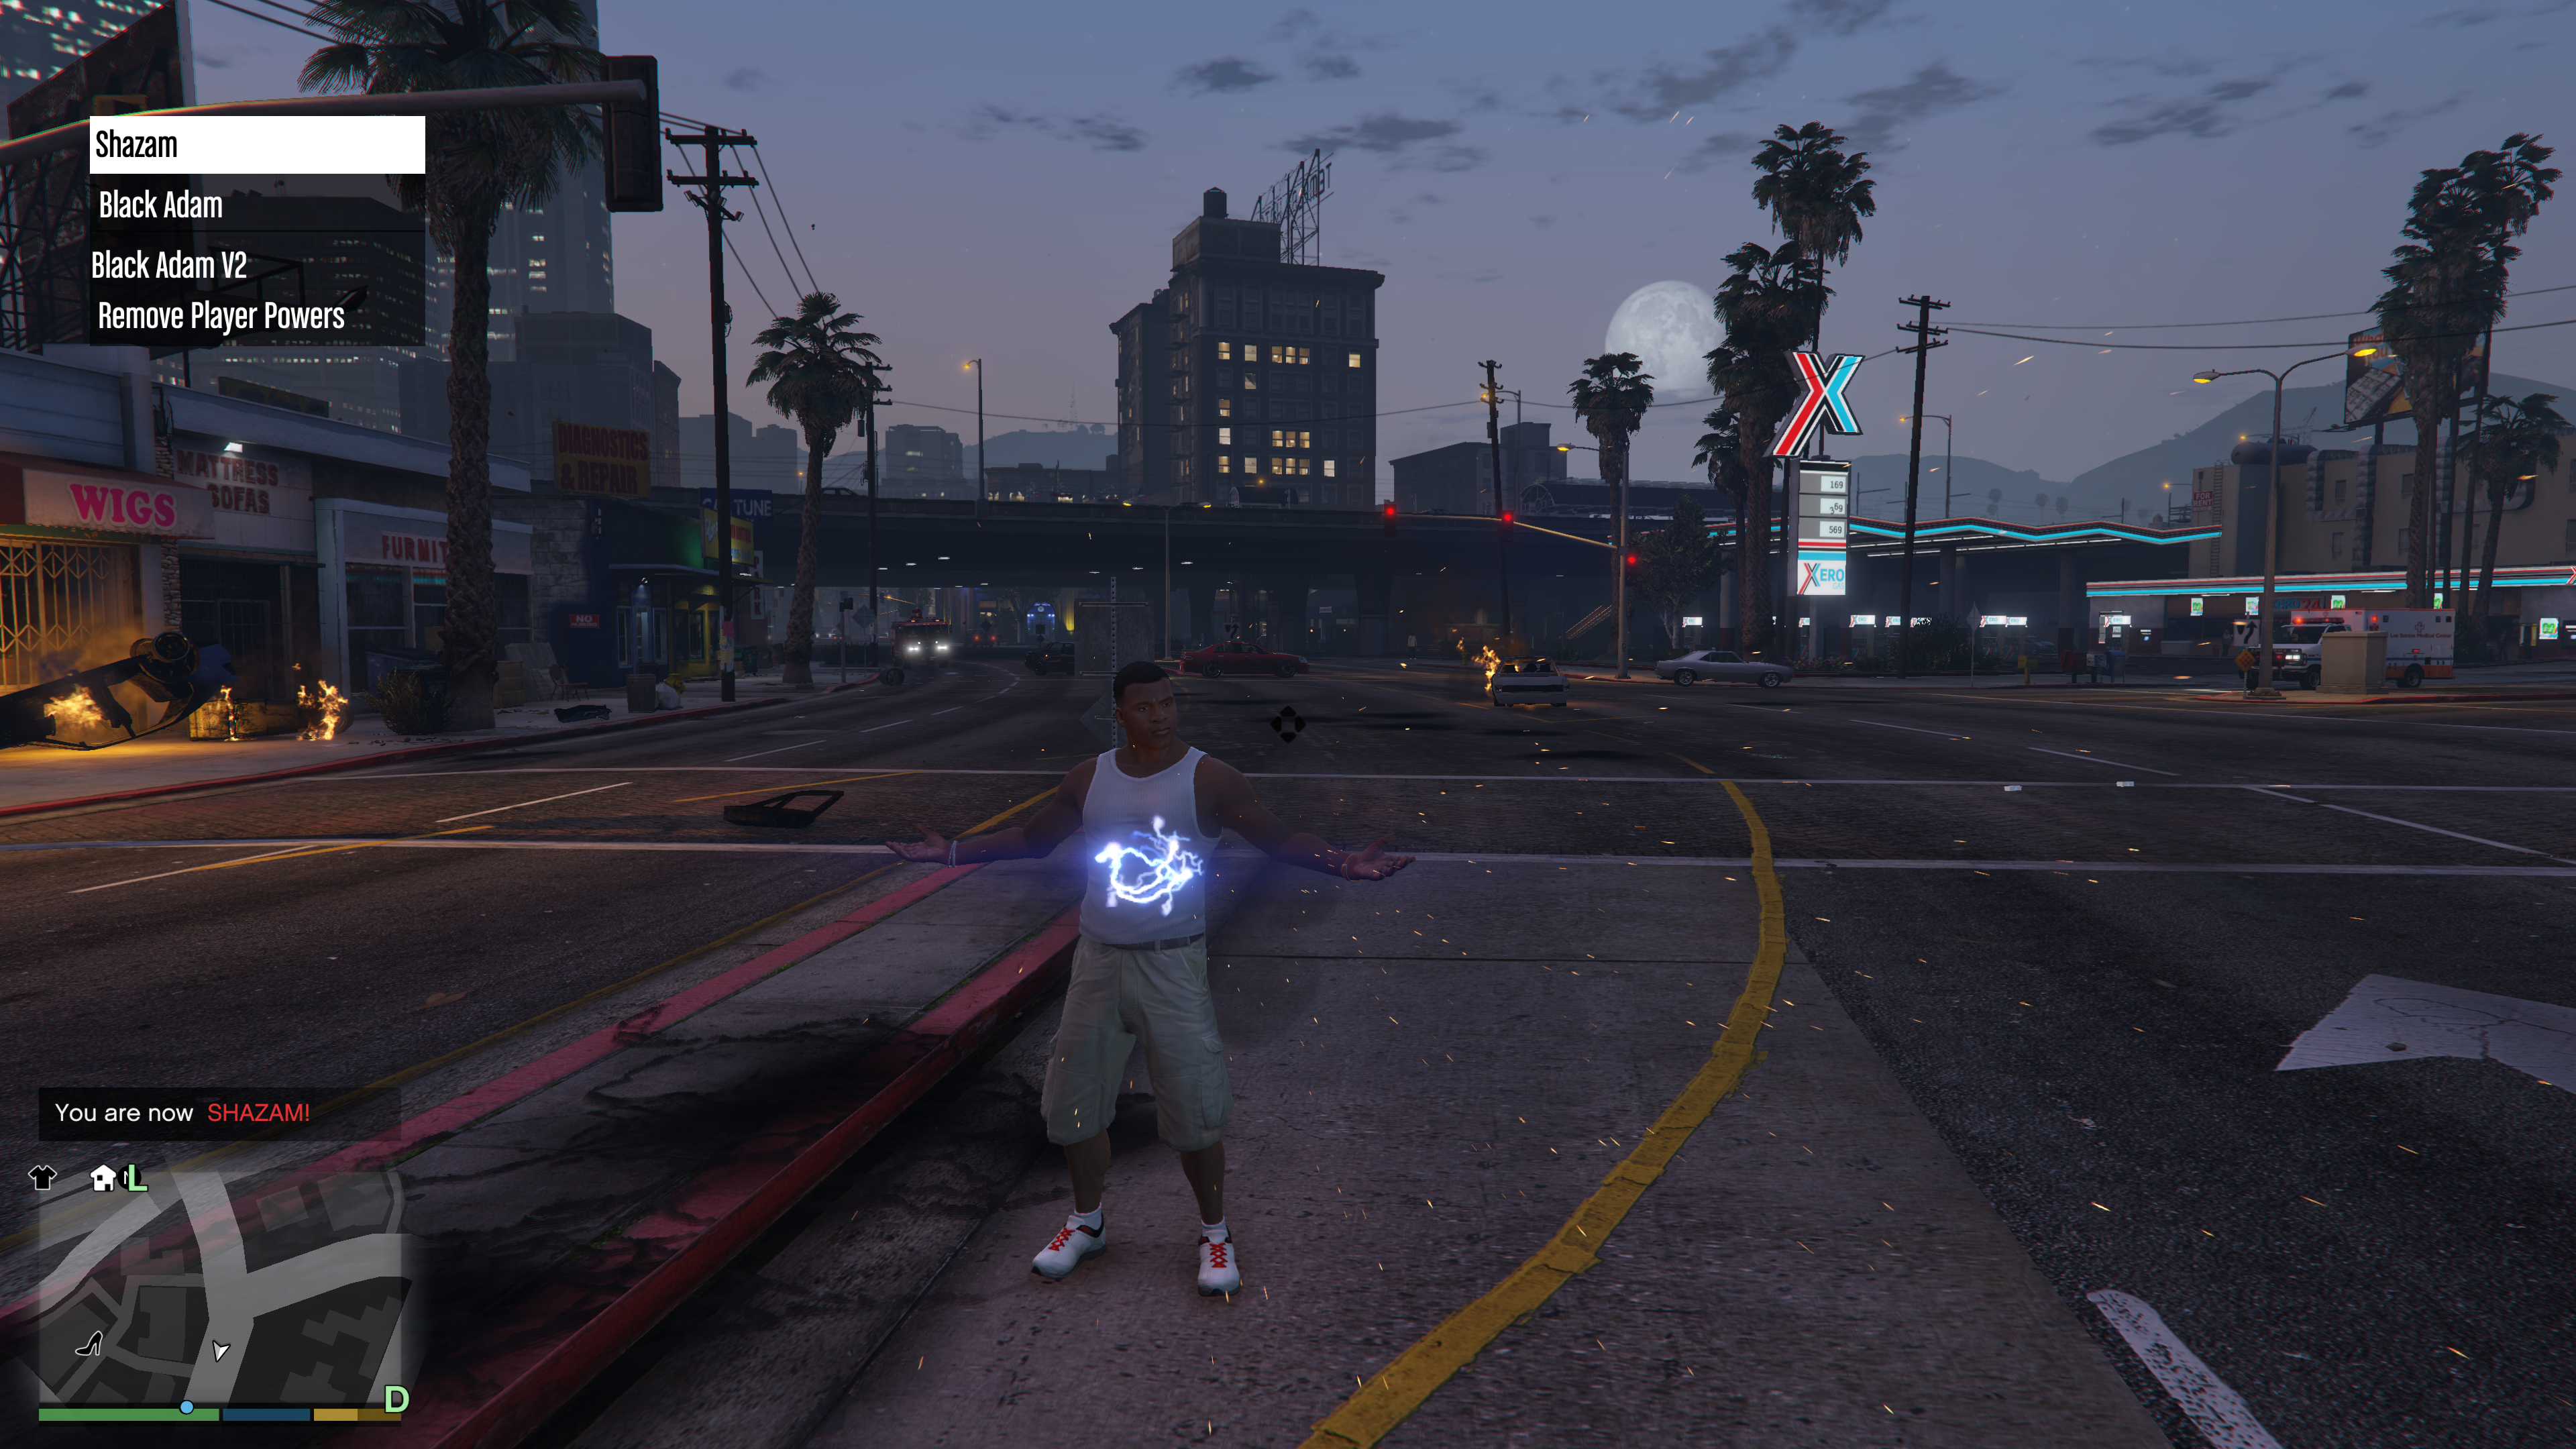
We might have activated the Shazam powers, but now you must be confused why our character doesn't look the part. That's because this mod is only a script that gives you the powers and not the skin of Shazam.
This brings us to our next mod type, custom character skins.
How hard would you say this is for someone that has never done mods before? I have not done them in any game. I kind of want to try it though.
GTA mods are fairly straight forward. The guide above takes out a lot of the guess work. I have recommended it to several people who have had no issues using BOOM's guide. It seems more complicated than it is. If you have any trouble with anything, just reply back and I can help. Good luck!
This might be the only thing worth me getting the game on PC cause I cannot bother with it online.
I never actually tried doing mods so I will see if I can manage to install anything.
When the game went on sale on Steam, I picked it up. Been having fun with it. Online is a bit of a mess at times from all the hacking but I am fining my way around it. I wanted to try some mods but had no clue what I was doing. This is a fantastic guide. Helped me actually get one running pretty fast.
A forum I was on before this one had a decent sized modding community and a small group focused on mods just for GTA 5. It was fascinating what can be done with the game. I really should try some of the more popular mods out there though.
I still have yet to mess with GTA mods. I ended up getting the PC version when it was on sale but didn't play much cause of all the hackers. I can mess around with mods though. Going to try this over the weekend.
This will come in handy. I was just starting to mess with mods. I hadn't really gotten deep into using them but since I am playing on PC again for the time being (my live ran out) I will check out some mods.